011 - Dalek Transmat
From Remembrance of the Daleks (1988)
Version 4 - Updated 7/22/2018
Finished: https://drive.google.com/open?id=1Qvt_M1l01hs0XJioxNTmlPEkQTaXzZBV

The zip file contains three sub-folders depending on whether you plan on printing a solid version (which must be painted) a modular version which uses flashing LED string light that are operated by a button, or a non-flashing version that uses a different type of LED string lights which can be operated by a switch on the base. You will need to print *ONE* copy of the Transmat platform in the root folder (I have included an alternate with a brim added, since mine was curling a bit), and *TWO COPIES* of everything in the Solid or Light-Up sub folders, depending on which version you want to make. Make sure this is clearly explained if sending the design to a professional printer.

Before painting, it is recommended that you fit all parts loosely together without glue to make sure that they fit and move freely. You may need to sand down some parts or drill out some holes if they are too tight or don't fit together smoothly.

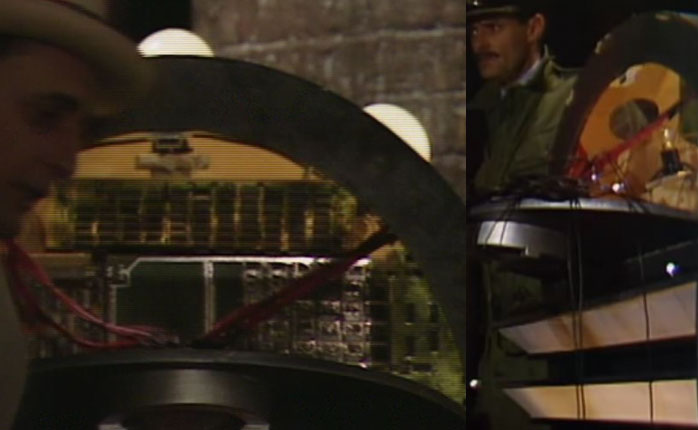
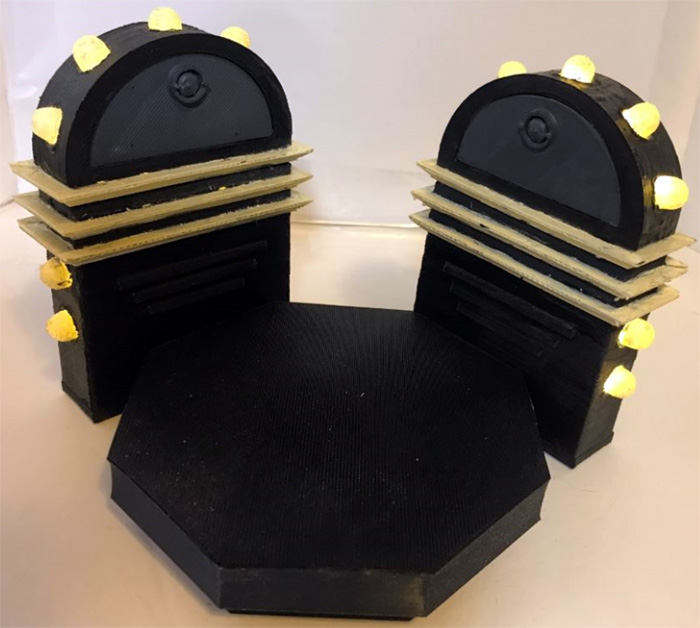
The transmat platform and generators are both flat black, and the access panel is a gun-metal grey. The inside of the generators appear to be a neutral cream color (or possibly just unpainted MDF).
The nine hemisphere lights are an off-white color and light up the "soft white" color of a filament light bulb. The three triangular border pieces are a similar color to the lights, but the top and bottom edges are solid black. The circuit boards are green and mostly silver (prior to getting smashed by Ace's bat) as shown below. There are also some red cables connecting the inner side walls of the generators to the back of the front access panel which help hold it in place when opened. These are too small and flexible to be reproduced on a 3D printer but if you want to go the extra mile, you can try using real red plastic-coated wires and embedding then in a small blob of melted filament on the back of the access door.
As you can see, the interior is partially illuminated, so it's okay if there's some light spillage from behind the circuit boards, but try to keep the LEDs secured firmly as far up into the top hemispheres as they will reach. (This will mainly be governed by the amount of wire you have between each LED). If you find the figure is too bright and lighting up areas that shouldn't be see-through, or you have unwanted LEDs at the end of the string it is recommended that you cover unwanted lights with tin foil rather than cutting off the LEDs themselves, since this can cause the remaining LEDs and wire to overheat and burn out faster. Tin foil can also be glued in place to form effective light barriers on the inside of sections that are not supposed to light up.
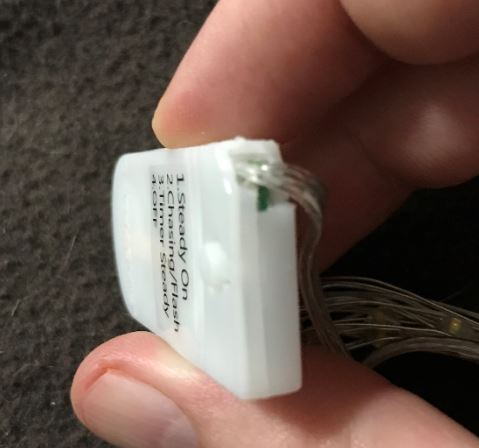
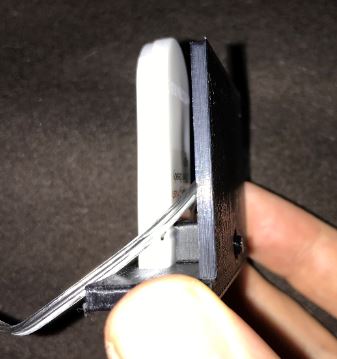
Light-up Recommendations: This can be a little tricky, especially if you're going for the flashing lights. The first thing you're going to need to do (after putting batteries in your string lights and making sure they all turn on, and painting the inside of the Transmat generator if you want it to be white) is carefully trim off the corner of the battery compartment with a pair of wire cutters so that the wires come out the side rather than the bottom. (see below) This will help the Transmat generators sit flat when construction is finished.
Next, insert the button piece into the back panel (this may need to be shaved down a bit depenending on how sloppily it printed, so that it moves freely in the square hole), then insert the battery pack into the hole in the back panel's base so that the button on the battery pack lines up with the button piece your printed and the wire comes out on the same side as the battery pack and IS NOT coming out the bottom. Once everything is in place, test that the printed button works for turning the lights off an on, then glue it together.
Next, make sure that your domes fit into the nine circular recesses on the outer perimeter of the Transmat generators. DO NOT glue them in place yet! We just want to make sure they fit. There's a pretty good chance the ones on the sides in particular may be slightly warped from the printing process. If this is the case, you can attempt to cut (with an xacto blade) melt (with a soldering iron) or drill them out to the appropriate size. We still want to retain the inner lip, so if using a drill, do not drill all the way through. A step bit is ideal for this purpose, and will give you a nice uniformly circular hole. You actually may not even need the drill, hand turning the step bit may be enough to smooth out the rough edges.

Once you know your domes will slot in place, then comes the tricky part (at least on the blinking LED version), where you have to snake EVERY OTHER LED through one of the nine holes to ensure all the lights that are visible from the outside will blink in sequence. This is easiest to do with the lights turned on, and you may need a crochet hook, tweezers, or some other tool to poke/pull them through the holes. For now, leave plenty of wire, since you don't want to have to try to fish one out from the wad in the middle once the two halves of the generator are glued together.
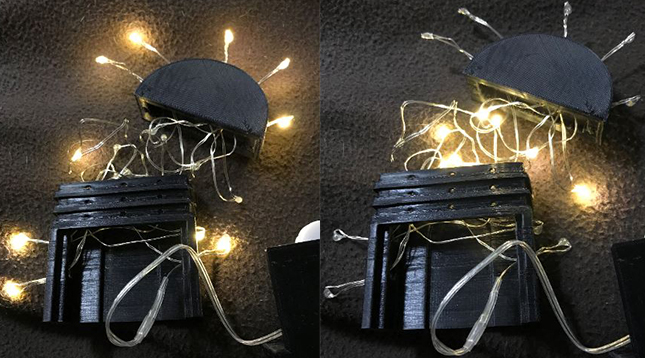
Next, glue the back panel in place. This will involve carefully making sure that the white battery panel slots into the arch-shaped hole with no wires underneath it, and no wires getting in the way of the panel itself. Once that's glued together, then shove as much of the wad of lights in the middle as you can into the middle area where the tiny circular holes are, and glue the top and bottom halves together as well, again, making sure that no wires are sticking out where they shouldn't.
Then add the three transparent border pieces, and once they're set in place, you can start gluing the LEDs into the domes, and gluing the domes into the circular holes (which you should have already tested to make sure they slot in place). Finally, once that step's done, tap down any remaining exposed LEDs, and glue your painted green circuit board into place. Then snap in the grey access panel door.
If you want to get fancy, you can then add extra wires from the side wall of the generator to the back of the door.

|
 |