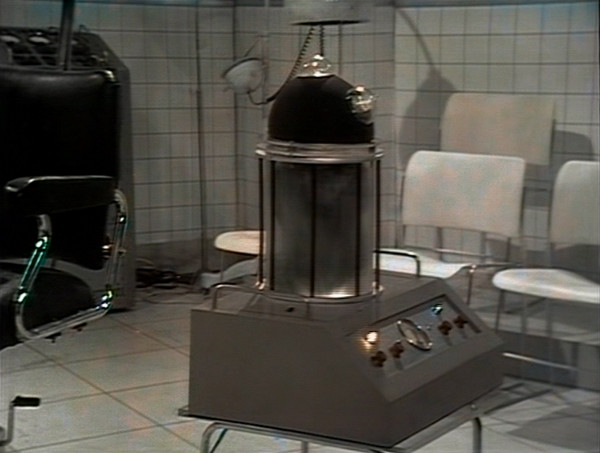
012 - Keller Machine
From The Mind of Evil (1971)
Version 4 - Updated 10/26/2019
Finished: https://drive.google.com/open?id=1CCvH7GgTlG8cSk0LmxseemFiAPrrCylU

I've tweaked this figure with SLA printing in mind, so there are now four folders with different variants in the Finished zip file above:

- Solid for PLA or SLA - A plain solid version that doesn't light up.
- LED Brick for PLA - This version has a hole for a 2x3 LED Light-Up Brick, that will make the figure light up (note that the button may not print on lower resolution machines, and it's recommended you use PETG for the transparent cylinder part)
- LED Brick for SLA - Uses the same style LED Brick, but has more surface detail and two options for the upper cylinder, a one-piece where the cylinder and dome are merged together and a two-piece, where the dome is removable so that you can see the mind parasite inside.
- LED Brick and resin holes for SLA - Same as above, but there are holes leading back from the two control panel lights to where the LED brick slots in place that can be filled with clear resin and then tinted to make these elements light up as well.
Rather surprisingly, I was able to print the Solid for PLA version on a standard 1mm resolution machine and the handles still came out, but your mileage may vary depending on your temperature settings. If you're having considerable trouble getting them to print, you may want to consider snipping them off with a pair of wire cutters, drilling two small holes for the bases, and then just inserting two bent pieces of filament of the appropriate lengths.
If you're going with the Solid for PLA version, it is recommended that the top section be printed in transparent PETG at 100% fill for maximum clarity. PETG requires a much higher print temperature than PLA (I set mine to 250) and works best at a super low print speed of about 10.
For SLA, make sure that you orient your print dome-side down, so that resin does not get trapped inside during the printing process. If you're printing the two-piece dome, you can fill in the ends of the two drainage tubes with a tiny bit of clear resin when you're done, but try to leave as much of the tube intact as possible, since the Keller Machine props had visible light bulbs in this area that the tubes simulate.
Depending on whether you want the option of removing your LED brick later (the battery will eventually die, but not for a good long while if you assemble it right) you can carefully fill in the underside of the model with resin and cure with a hand-held LED, but be wary as there are some small holes leading into the LED brick, that you do not want to accidentally trap resin in. Putting down a very thin square of tin foil to prevent light leakage may also help in this regard.

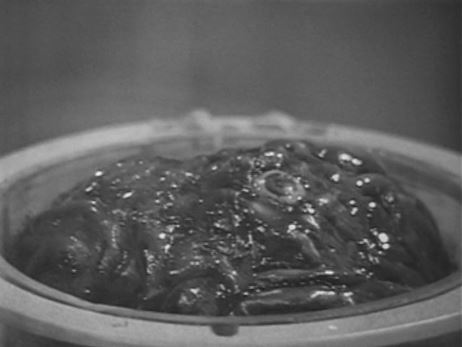
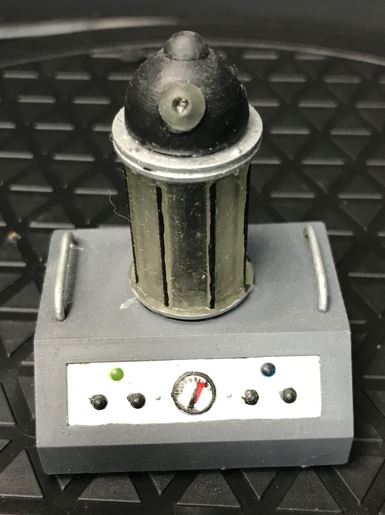
I recommend using a white or red LED brick depending on what effect you're going for. (for most of the episodes it's got a white light, though later it's psychic attack effect is orangeish) Since the underside of the brick is exposed, you'll need to paint it with grey model paint, and probably the rest of the figure as well to be consistent. The handles, neck, and control plate are metallic silver, the top, vertical struts, and knobs are black, and the left light on the front is white or yellow, and the right light is blue. The parasite creature has a small white eye in the center, as seen in the second photo.
If you are printing the LED Brick and resin holes for SLA version, mount your LED brick, and do all your painting and assembly first. As your last step, fill the cone-shaped holes leading from the front panel to the LED Brick with clear UV resin. (this should be done in a couple of layers so you can cure each one with your UV light.) Once you have filled the cones up to the surface of the control panel, mix a tiny bit of UV resin with a drop of liquid UV Resin coloring dye and use a 1ml syringe with a blunt tip 18GA or 20GA dispensing needle (or carefully try to drip from the point of a pin) onto the surface where the light is supposed to go. The drop should form a natural bump. You may have to do this once or twice, but ideally you only want the outside surface of the light to be tinted resin so it gets the maximum amount of light shining through from the LED brick. If your color tinted resin runs, wipe it off quickly with a paper towel soaked in Isopropyl Alcohol and try again. Do not let it get exposed to UV light.

|
 |