015 - Hand of Omega
From Remembrance of the Daleks (1988)
Version 6 - Updated 8/31/2021
Finished: https://drive.google.com/open?id=1OIhAJUxiarGyhz49H4Dtn-wfRIl1DTLu

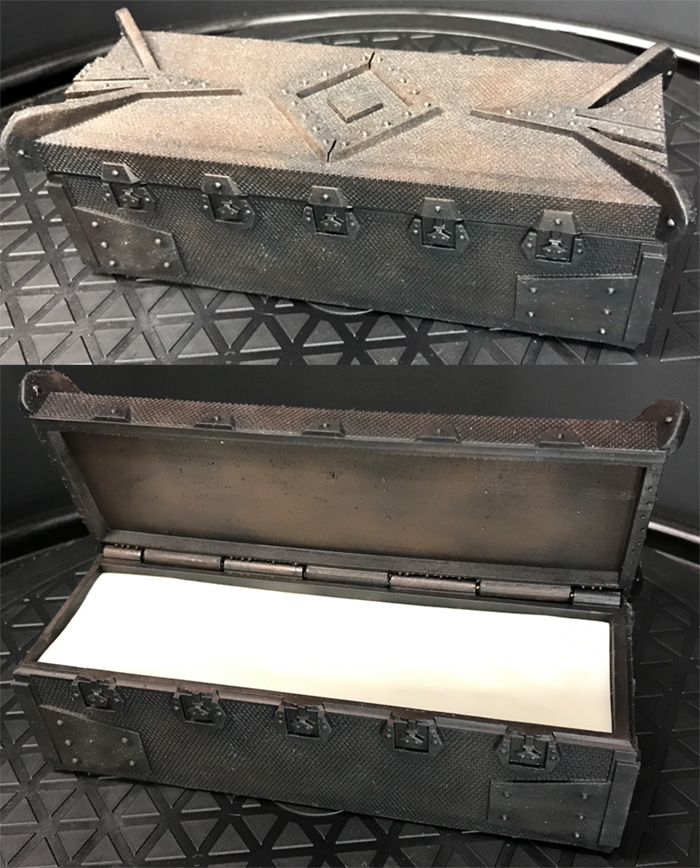
This is another large figure that will only fit on filament printers with a 7" x 7" or larger build area. Please verify your printer is large enough to handle it before you attempt to print it. The figure should fit fine on a standard Anycubic Photon or Elegoo Mars resin printer, if angled vertically.
The files are divided into two folders for PLA (filament) or SLA (Resin) printing. Be sure to only use the version of the files that correspond to you style of machine.
You have the choice of printing a Thicker Fog Layer or Thin Fog Layer. If you are printing out of transparent PETG, semi-transparent PLA, or clear resin, you may want to use the Thicker Fog Layer for a more diffused light effect. The Thin Fog Layer is more useful if printing out
of white PLA or resin, as it will allow more light through the opaque material.
The PLA version comes with an optional Inner Lid Block that can be glued to the underside of
the lid to hide the rough edges caused by removing the supports. This is a purely cosmetic piece, and can be ignored if you plan on finishing off the rough surfaces in another way.
Both versions come with an optional Clear Stand part (that can be used to make the casket hover
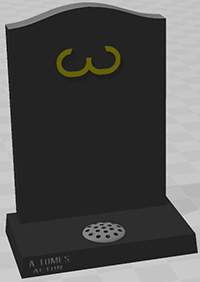
at waist height) and Omega Gravestone.
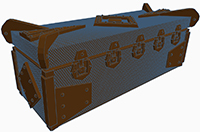
For filament printing the box and lid, I recommend using Gizmo Dorks Metal Copper Fill filament if you can find it. The color is absolutely perfect, and looks quite a bit like real metal.
Alternatively, if you are resin printing, I recommend using a black resin for the box and lid, which you can dry brush over with a copper/bronze paint to retain some of the dark edges in crevices. Before you cure the box or lid make sure you have cleared out any excess resin from the holes insode the hinges. You may need to invest in a flexible 12" drill bit, approximately 2mm or 1/16 in thick for drilling out the hinge holes if you forget or they end up getting clogged.

This figure requires at least one 1.5mm wide brass rod to be trimmed to length for the lid. These craft rods can be found online or in most craft stores that have a model airplane section. Alternatively you can use a thin wire coat hanger, sturdy piece of craft wire, or even a toothpick but you may need to widen some holes prior to final curing with a small hand drill.
This figure is also designed to work with the style of LED fairy string lights that have a button, so the lights can be turned on and off from the bottom of the figure. You can use the style of string light that is operated by a switch, but if you do so,
you will have to remove the upper fog layer every time you want to access the switch to turn it on and off.

Before painting, it is recommended that you fit all parts loosely together without glue to make sure that they fit and move freely. You may need to sand down some parts or drill out some holes if they are too tight or don't fit together smoothly.

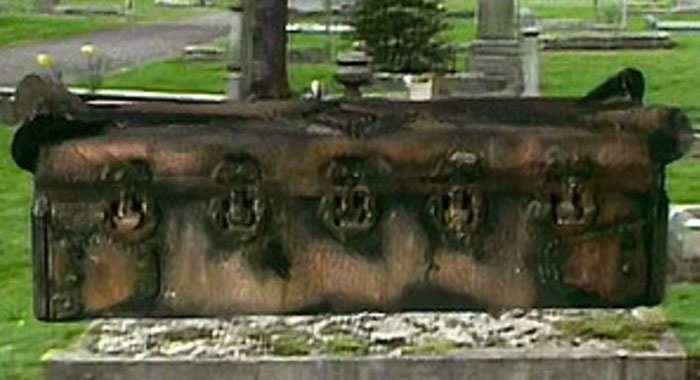
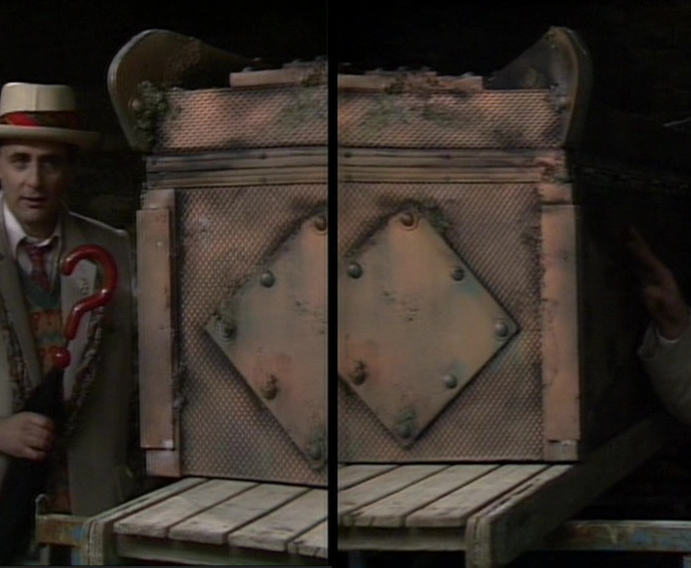
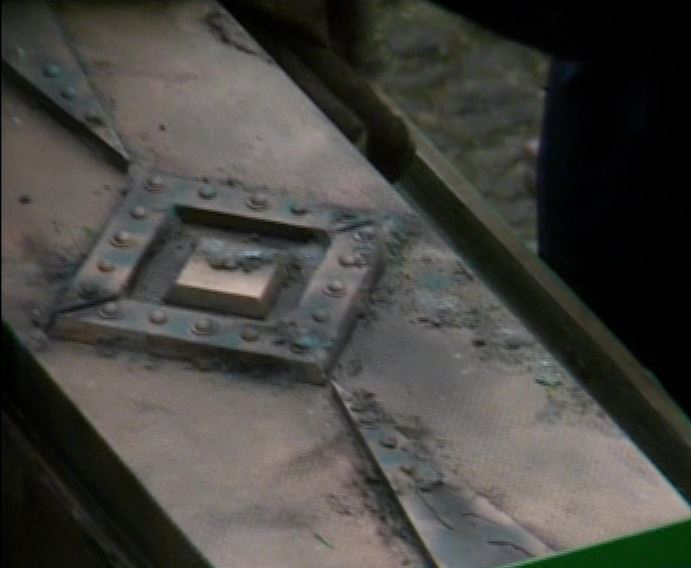
The Hand of Omega is usually seen throughout the episode layered in with bad CSO, which makes the dirt and grime added to it appear especially dark. During the few scenes where it's a static prop, we can see that this effect is much less pronounced, so if you're going to dirty your Hand up, go easy on the black paint.
To maintain maximum surface detail on my figure, I first airbrushed on a flat black backer layer and then covered that in a mixture of Metallic Copper, Dark Brown, Rust, and more black backer, and airbrushed this on somewhat unevenly. I then went back with a final extremely light coat of black to dirt up some of the darker areas.
If you are using LEDs, you will probably encounter some light seepage through the sides of the box, even after painting, so it is a good idea to line the inside of the box with aluminum tape, or even good old fashion tin foil. A single layer of either will prevent unwanted light from going places where you don't want it to go.
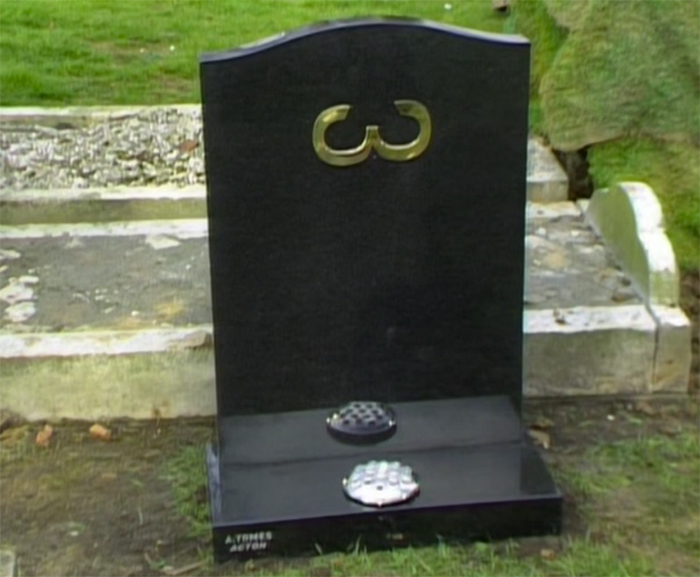
The headstone should be a shiny reflective black. The omega symbol is a polished gold, and the round flower holder on the base is bright silver. The maker's mark in the lower left corner has white lettering. It is unlikely this will show up on most prints, but if you print the headstone out of black resin (this will only work if the print is black to begin with and unpainted), then paint over the letters with a white Testor's paint pen, and then very quicky wipe off the surface with a lightly moist paper towel, with a bit of luck you can fill in the tiny depressions of the letters with white paint while leaving the rest of the print black, causing them to become visible, similar to the destination dials on the 8th Doctor TARDIS Console Room set.

|