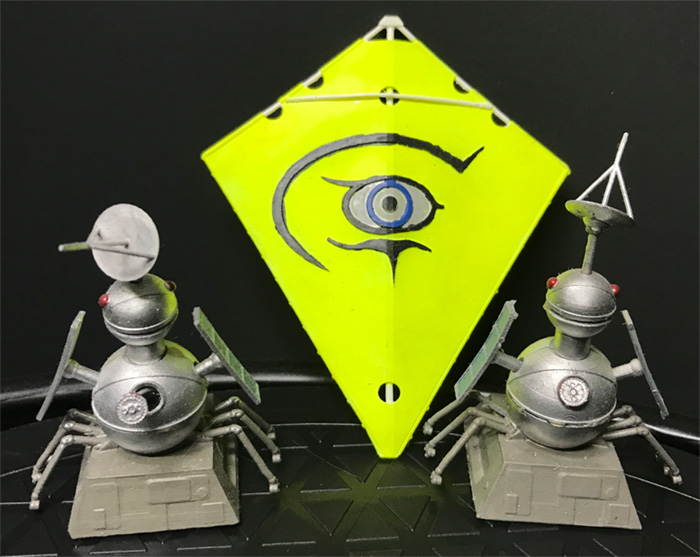
031 - Junk Mail Robot & Spy Kite
From The Greatest Show In The Galaxy (1988)
Version 2 - Updated 5/6/2020
Finished: https://drive.google.com/file/d/1FPiVRBbdEzq0nH0MzIwZxb-Xxjmav6YJ

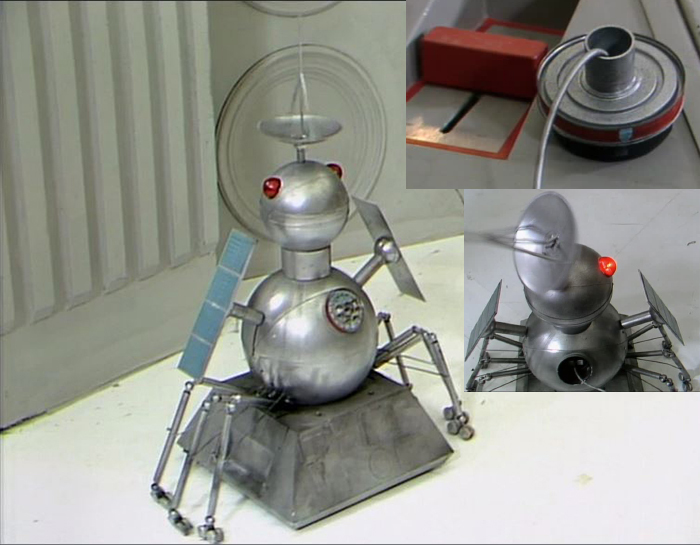
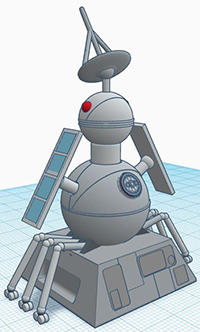
The Junk Mail Robot started out as a quicky and dirty remix of an excellent design by James Kersey to bring it into 5.5" scale and make it 3D printer friendly, but as is the way with these things, I ended up ripping it apart and putting it back together again to make it as screen accurate as I could, given that the prop does not appear to have made it to public exhibition and was only shown on screen for a couple of seconds.
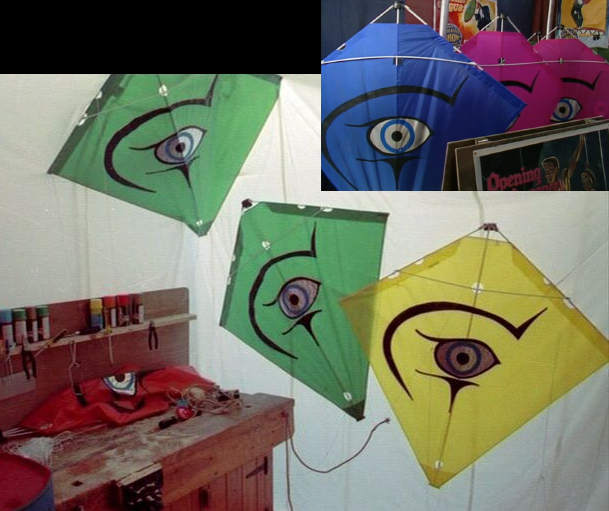
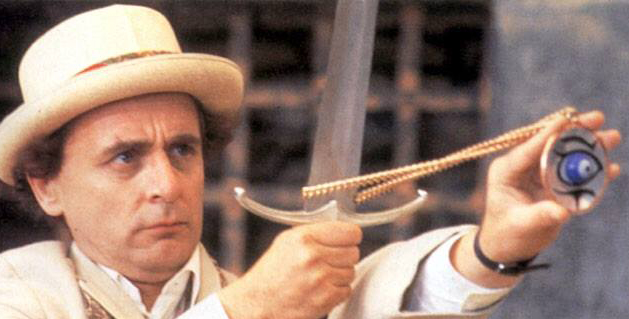
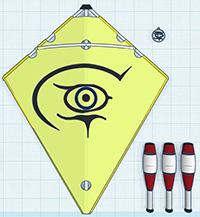
This release is sort of a hodge podge of material from Greatest Show In The Galaxy, since James' design also included some juggling pins for the 7th Doctor, and not to be outdone, I decided to throw in a Spy Kite and the Psychic Circus eye medallion featured several times throughout the episode to add to the menagerie.

The files come separated into PLA and SLA versions. Several of the smaller elements like the legs and antenna may not print on a PLA printer, so if you're having trouble with those parts, I recommend checking your local hobby store or Amazon for 1.5mm (1/16 inch) aluminum tubing. This can be used to replace just about any part that doesn't print properly. Alternatively you can try using some 1.75 mm PLA filament right off the roll (though you may need to sand it down a bit or widen some of the holes.)
All parts, except the base should be printed at 100% fill for maximum strength. The base can be printed at 40% fill if you're filament printing, or made hollow for resin.
If resin printing, I would advise adding some flexible resin like Siraya Tech's Tenacious as an additive when printing the legs, antenna and solar panels so they have a tiny bit of flexibility and are less likely to break if bent.
I have included two different alternate versions of the legs file for SLA -- one angled, one with cut-away supports, similar to the PLA version. Since the amount of resin required is negligible, I recommend printing a couple of each, and just hope that enough of them make it through to be usable.

You will need some plastic coated wire about 1 to 1.5mm thick (grey) for the chest plug. It needs to be flexible enought that it can easily be pushed back into the chest cavity, but rigid enough that it will "hover" in midair when pulled out.
And as previously mentioned, if you're not printing the legs and antenna out of flexible resin,
you might want to subsitute some lightweight 1.5mm thick aluminum tubing if you can't get those bits to print.

Before painting, it is recommended that you fit all parts loosely together without glue to make sure that they fit and move freely. You may need to sand down some parts or drill out some holes if they are too tight or don't fit together smoothly.

The Junk Mail Robot is mostly polished steel color, though the base is a little grungier and less polished. The eyes light up red, there is a dark red ring around the edge of the chest plug, and the squares on the solar panel appear bluish in most sequences though this is probably partially due to being semi-reflective, and they may be a darker glossy grey color outside of studio lighting. The interior of the chest is dark but should probably be painted black or dark grey to hide the internal mechanisms.
The Spy Kites came in a variety of colors, including yellow, orange, green, blue, and pink, though the yellow version was the one flown during most exterior recording sequences.
The kite rods are white, and because they're semi-transparent, the area where the fabric is folded over along the edges appears slightly darker.
The Doctor's juggling pins (from the top) have a black rubber tip, a thick dark red stripe, a thin black stripe, a thick white stripe, a thin black stripe, another thick stripe of dark red, a thin black stripe, the silver aluminum handle, and then a black rubber base.

The eye medallion is reflective mirror silver with a rose gold outer trim and chain. The eye drawing is black and the eyeball is blue with a white iris and small black pupil in the middle.

No assembly is needed for the Spy Kites.
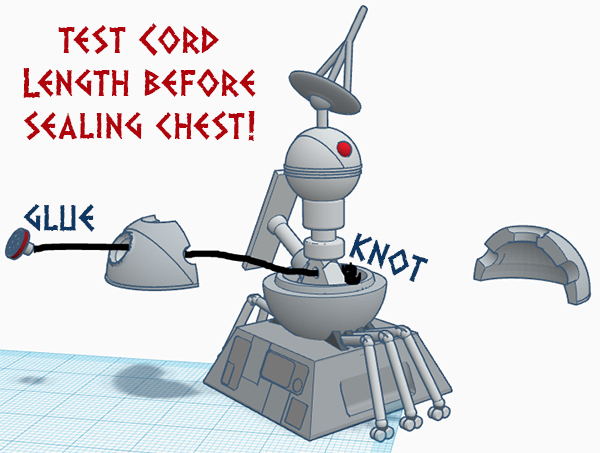
The Junk Mail Robot has a small hole in the center of the chest cavity that a small piece of plastic-coated wire or cording can be threaded through. Just cut off about 3 inches and then peel off just the grey wire.
After painting, knot one end of the wire and shove the other end through the hole in the lower chest section as well as the upper front chest section, as shown below. Then crazy glue the unknotted end into the hole in the base of the chest plug. Before you seal it up and glue everything in place, make sure you have tested pulling the plug out and pushing the cord back in a few times so you know the balled up cord will fit in the chest cavity.
I recommend glueing the solar panels securely in place when you seal up the chest, since they tend to flop around and look ugly if you do not. You can leave the head free-rotating or glue it in place as well. (gluing the head in place will make it slightly easier to spin the top antenna)

|
|