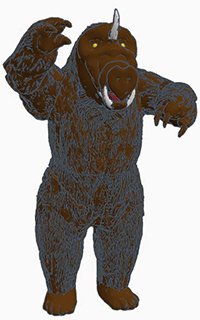
036 - Aggedor
From The Curse of Peladon (1972) and The Monster of Peladon (1974)
Version 1 - Updated 6/2/2021
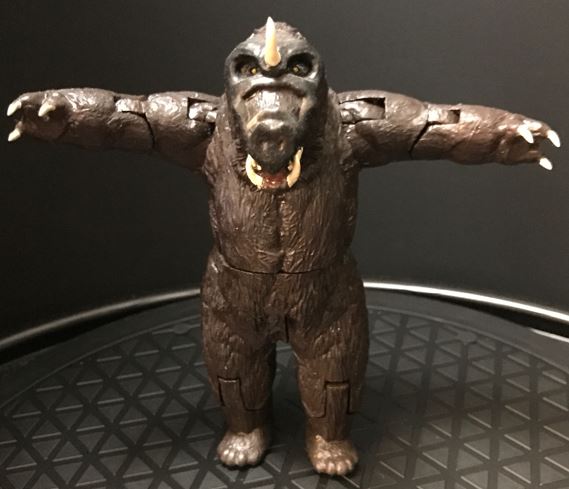
Finished: https://drive.google.com/file/d/1kbCTExV2BZts7sOxhh68Hlfk0hbESOek

The files used to print this figure are exactly the same, regardless of whether you are printing in filament or resin. There are no alternate or optional parts this time around.
While SLA resin is preferrable, there's no reason why it shouldn't work in PLA... it'll just look a little rougher on the underside of parts that have overhang.

This figure require the use of 1.5mm wide brass rods to be trimmed to length for the shoulder, elbow, knee and
jaw pivots. These can be found in most craft stores that have a model airplane section.
Alternatively you can use a wire coat hanger or even a toothpick.

Before painting, it is recommended that you fit all parts loosely together without glue to make sure that they fit and move freely. You may need to sand down some parts or drill out some holes if they are too tight or don't fit together smoothly.
This figure require the use of 1.5mm wide brass rods for the two arm pivots (though you can substitute a bit of nail, wire coathanger, or even a toothpick if you're desperate.) Stick the rod in through the side hole (you may need to carefully widen it with a 2mm drill bit if it's collapsed), mark it, then snip the rod just a mm or two shorter than the mark, so the edge doesn't stick out past the opening. After painting, attach the two pieces together with the snipped brass rod, then seal the end of the hole with some UV craft resin, glue, milliput, or something similar and paint over again once dry.

Aggedor's coloration is pretty simple. His body and most of his head is a dark brown "bear" color, but the fleshy parts of his face and the pads on his paws are a darker coffee brown color. His horn and teeth are an ivory color, though his claws are slightly whiter. His tongue and the inside of his mouth are a dark red.
His eyes, though difficult to see in the transmitted story, are yellow with black pupils.


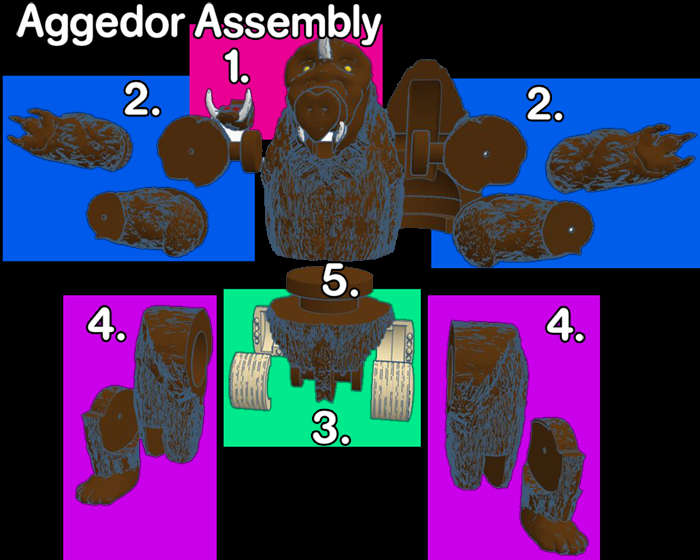
Assembly is fairly straightforward.
Begin by inserting your 1.5mm wide brass rod into the jaw hole. Snip the rod about 1-2mm shorter than the hole. You can then seal the open end of the hole with UV craft resin, glue, or sculpter's putty to seal the rod in place.
Then repeate this process for the shoulders and elbows and knees to assemble all four limbs.
The leg joint sheaths must be carefully glued around the T-plugs of the crotch. Make sure they spin freely and be very careful not to get any glue on the T-plugs themselves.
Once the leg joint sheaths have fully dried, apply glue to the outer edges and insert into the leg holes. Be careful that no glue leaks out and gets on the crotch part.
Once all four limbs are assembled, insert the T-plugs of the shoulders and crotch into the body and glue the back in place to lock them into their sockets.
Make sure that the shoulder and waist spin freely and did not get any glue on them.

|