037 - Wirrn-Infected Noah
From The Ark in Space (1975)
Version 2 - Updated 9/22/2025
Final: https://drive.google.com/file/d/1CiO1QAHk7pTFu7hIfjtd1IAmf-GeaV_j

The files used to print this figure are the same, regardless of whether you are printing in
PLA (filament) or SLA (Resin). This figure is primarily designed for SLA resin printing,
some small parts, like the two halves of the belt and the gun accessory may not print properly
in PLA. (if you are filament printing I recommend at least using PLA+)
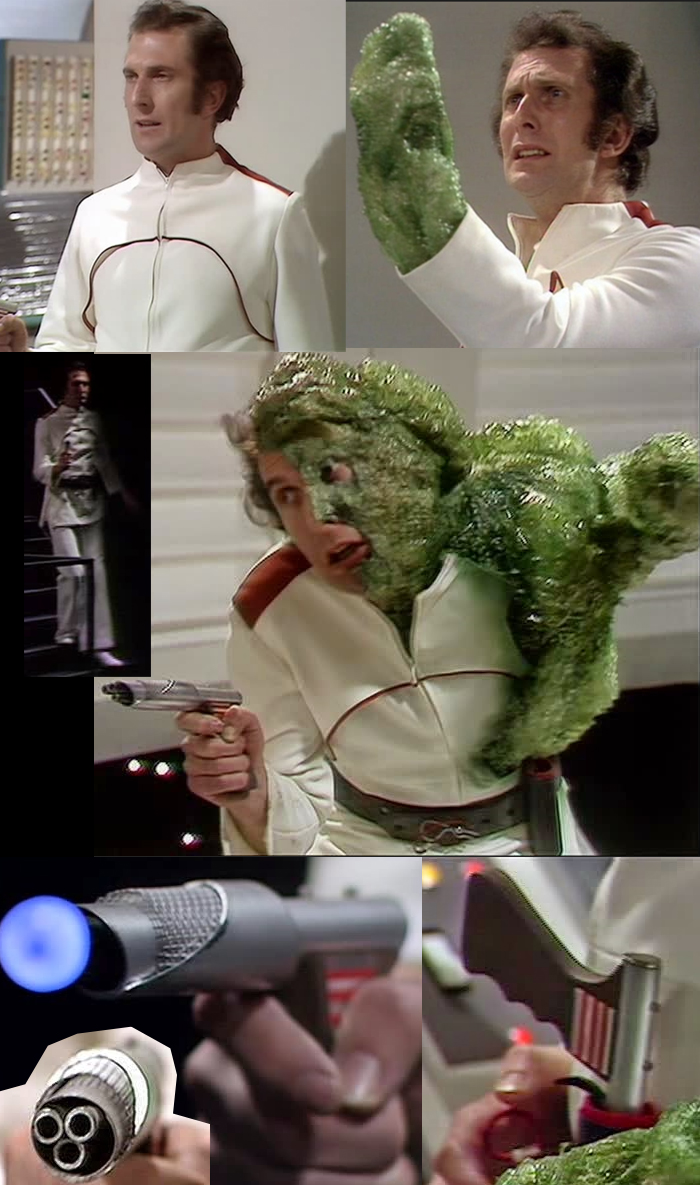
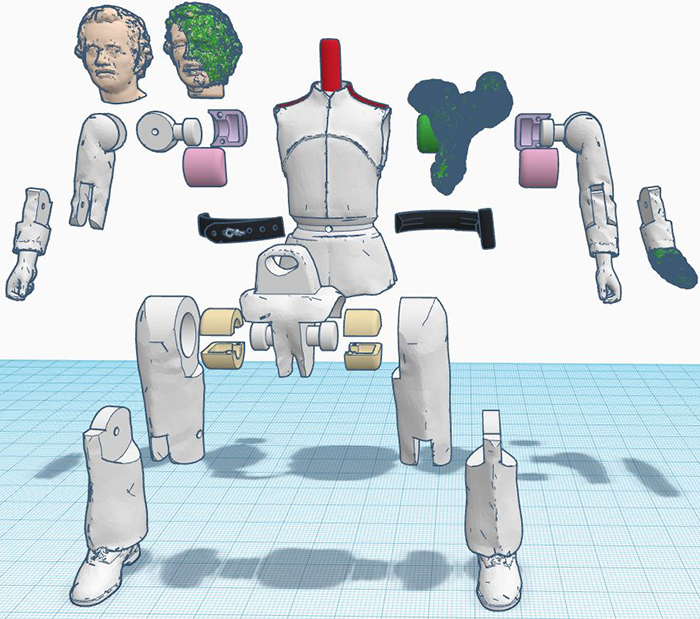
This figure contains two heads and three optional left arm designs that will allow you to switch your Noah figure between different stages in his mutation. If you want to print three separate figures you will need to print the Tunic, both Belt halves, the Crotch, Left and Right Thigh, Left and Right Leg, Shoulder Joint Sheaths, Hip Joint Sheaths, Right shoulder, Right Shoulder Plug, and Right Hand EVERY TIME.
Uninfected Head is only needed for Uninfected Noah.
Infected Head is only needed for Infected Hand and Fully Infected Noah.
Left Shoulder is only needed for Uninfected and Infected Hand Noah.
Left Shoulder Plug is only needed for Uninfected and Infected Hand Noah.
Left Hand is only needed for Uninfected Noah.
Left Infected Hand is needed for Infected Hand Noah.
Infected Shoulder Insert is only needed for Fully Infected Noah.
The gun accessory is purely optional, but can be used with all three variants.

This figure require the use of 1.5mm wide brass rods to be trimmed to length for the shoulder, elbow, knee and
hip pivots. These can be found in most craft stores that have a model airplane section.
Alternatively you can use a wire coat hanger or even a toothpick.

Before painting, it is recommended that you fit all parts loosely together without glue to make sure that they fit and move freely. You may need to sand down some parts or drill out some holes if they are too tight or don't fit together smoothly.

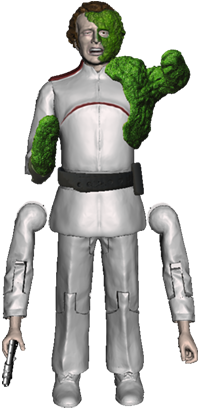
Noah's uniform is all white, with dark red shoulder
epaulettes and a thin trim around the edge of the upper tosro area. This goes all the way arond the body in a ∩shape on both sides. There is no trim at the bottom of the uniform. The pants and shoes are also the same color of white.
His bubble-wrap arm and infected face are a light green, though you can see faint traces of flesh through them.
His belt is black, but the holster has a red trim at the top and bottom the same color as the epaulettes. The front of his belt is secured by a small P shaped metal pin.
The gun is mostly silver with a black handle. The back of the gun tube, the two bolts on top, the trigger, and the three internal barrels are also black. The trapezoid shaped pattern on the side of the gun consists of four silver tubes with red lines between them.

To assemble your figure, begin with the arms, attaching the hands to the upper shoulders, upper shoulder to the shoulder plug, and the shoulder plug to the shoulder joint sheaths. This will give you the complete arm assembly.
The right arm (that's his right, and your left while looking at him) can be glued in place into the torso. Do not glue the other arm if you want to be able to swap it out with the Infected Shoulder Insert later.
Next, attach the feet to the thighs. Then attach the hip joint sheaths to the crotch. Make sure these spin freely. Do not twist too hard, or you may break the fragile joint. Next, insert the joint sheaths into the holes in the thighs. If they are too tight, don't force them, sand them down on the outside until they slide in place without effort. Then crazy glue them to the shin parts.
Next, insert the entire leg assembly up inside the skirt of the torso. You must fully assemble the leg parts before doing this, otherwise you won't be able to get the shins past the skirt.
If it doesn't fit smoothly, you may need to sand down the upper loop part of the crotch to make it fit. Once it is in place, stick one of the 1.5mm rods through the torso and loop of the crotch part to link them together. This should allow your figure to lean slightly. Trim off the rod to length, and then glue the belt around the outside of the torso, hiding where you inserted the rod.

Coming soon.
|
|