This was the annual April Fools Day figure release for 2022. While certainly not part of regular Doctor Who canon, the single was a chart-topping hit for a few brief weeks in the summer of 1988, and the video (which featured rubbish cardboard box versions of the Daleks) became a staple of PBS pledge breaks in the United States for at least a couple of years to follow.
If you somehow managed to miss what Bill Drummond called "the most nauseating record in the world" don't say you weren't warned...
The files used to print this figure are the same, regardless of whether you are printing in
PLA (filament) or SLA (Resin). This figure is primarily designed for SLA resin printing, and some small parts, like the antenna, eyestalk, and plunger may not print properly in PLA.
If you are going to print in filament, printing I recommend at least using PLA+ if you can find it.
This design includes two alternate versions of the base:
Base With False Wheels - Has fake non-rolling casters on the bottom, if you just want a static display figure. Base Without Wheels - Has no casters and will allow you to glue in Lego plane wheels to the underside of the lower box if you want the figure to be able to roll when pushed.
You can also print the Plunger, which included both the plunger end and the entire arm, or Plunger Tip Only if you would prefer to use an off-the-shelf metal or plastic rod. You will still need to print the Plunger Pivot Ball in either case if you want the plunger to be able to move up and down.
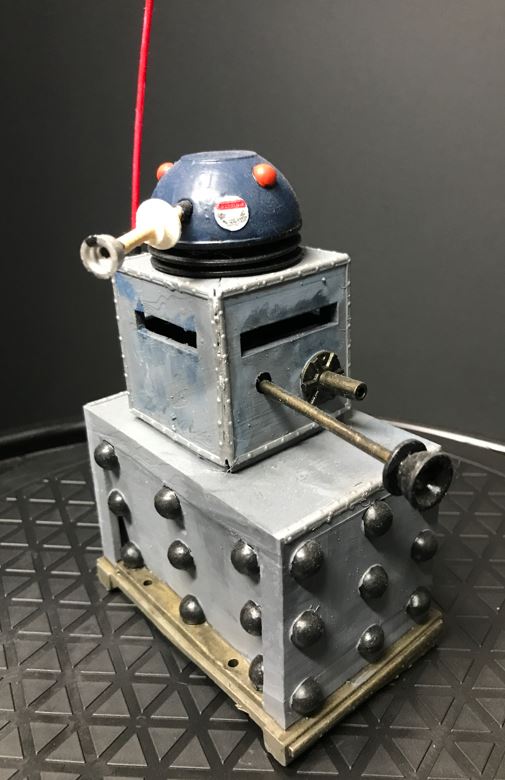
Before painting, it is recommended that you fit all parts loosely together without glue to make sure that they fit and move freely. You may need to sand down some parts or drill out some holes if they are too tight or don't fit together smoothly. The body
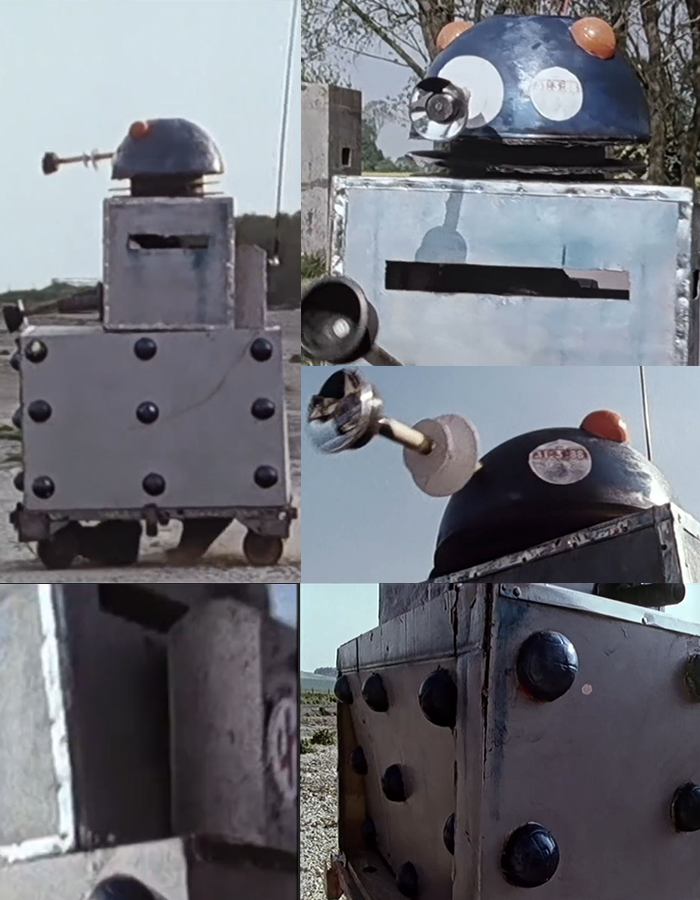
of the KLF Dalek is a light grey, with slight traces of blue showing through. The upper box and front edge of the lower box have a light silver aluminum trim. The neck section is black and the topmost neck disk is flush with the underside of the dark blue salad bowl head. The dome lights are bright orange. The round sticker on the right side of the face has a red bar with white numbers 31:3:88, and some incredibly tiny dark text. I recommend painting the head that goes inside the box solid black so it is only visible as a shadow.
The eyestalk appears to have a plain wooden dowel (or drumstick) for a central shaft, which is secured by black electrical tape at both ends. The eye rings are white. The eyepiece is reflective silver, but has an oddly triangular piece cut out at the top which is black. The center of the eyepiece is also black.
The head of the plunger and the flat disk behind it are both black but secured with a silver screw and washer in the center. The plunger arm and gun stick are both a dark iron grey. The hemispheres, boots, and caster wheels are black
and the base is a darker rusty steel color. Note that there are no hemisperes on the back of the Dalek.
The "backpack" box has a black slit on top and the round sticker is white with a red symbol in the center. The antenna is a bright red, but has two thicker black insulators and the ball where it connects to the backpack is chrome silver.
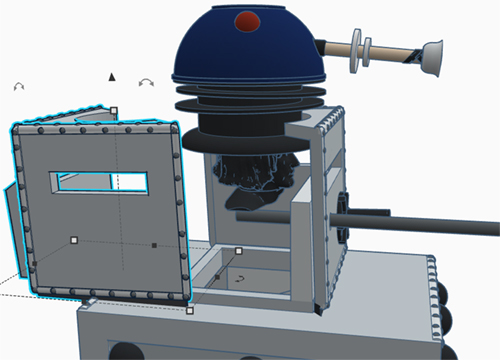
This figure must be assembled in a specific order (see below)
1) Glue the Eyestalk to the Head and Dome.
2) Glue the Left Boot Lower and Left Boot Upper, then the Right Boot Lower, and Right Boot Upper in a clamshell around the Staggered Leg Axle. The left and right legs should hang down freely when the leg axle is turned. Do not allow any of the boot parts to stick to the axle. Set aside until dry.
3) Glue whichever version of the base you are using to the lower box. Then insert the entire leg axel assembly up into the underside of the lower box and into the two 45° angle slots on the side walls (see below) Once the leg axel is around the curve and all the way down in the lowest part of the slot, glue the two Leg Axle Plugs in place to lock the Leg Axel in position. (It may move up and down a little bit, but it shouldn't fall out accidentally)
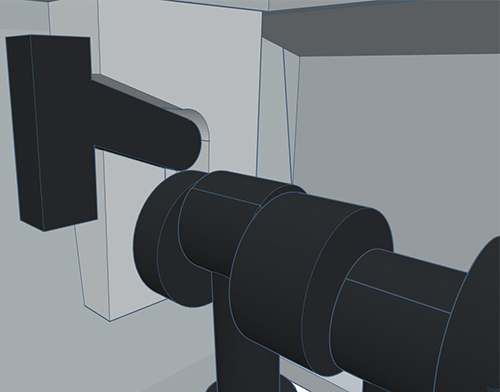
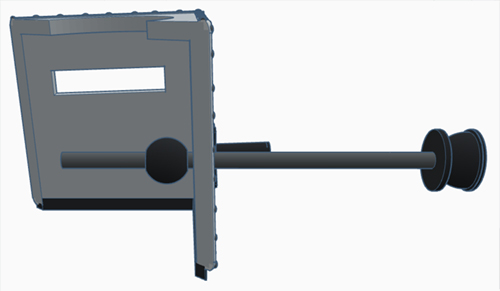
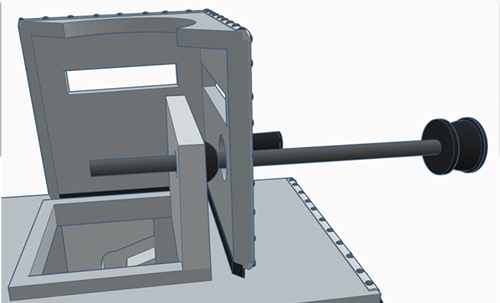
4) Insert the Plunger Arm (or craft rod, if you're using one) through the hole in the Upper Box Front, then slide the Plunger Pivot Ball on from the back. There should be enough of the plunger arm sticking out the back that it sticks about halfway into the Upper Box. Glue the Pivot Ball to the Plunger Arm.
5) Insert the back of the Plunger arm into the circular depression on the top of the Lower Box. This will create an enclosed socket for the Plunger Arm. Glue the Upper Box Front to the Lower Box to seal the arm in place.
6) Insert the Head and Dome into the neck hole of the Upper Box Front, then glue the Upper Box Back around it and the Lower Box to form a clamshell. The head should wobble around loosely, and just barely touch the top of the Plunger Arm.
7) Attach the antenna to the back, and glue the lego plane wheels onto the underside of the base if you are going to use them, then sit back and enjoy the stupidest looking Dalek up until the creation of the New Dalek Paradigm!
Designs featured on this page are protected under Creative Commons License CC BY-NC-SA (Attribution-NonCommercial-ShareAlike) and will only remain available as long as licensed versions of the figures do not exist. All files, including all future releases will stop being shared if *ANYONE* is discovered attempting to produce and sell figures based on these designs for financial gain.
If you aren't sure what this means, read the F.A.Q. page, or just assume that if you are requesting money in exchange for products printed using these templates, you are breaking the project rules and DON'T DO IT!
Doctor Who and all related IP rights belong to the BBC. This is a not-for-profit fan site for personal entertainment purposes only.
No copyright infringement intended.