040 - Silurian
From The Silurians (1970)
Version 1 - Updated 10/12/2022
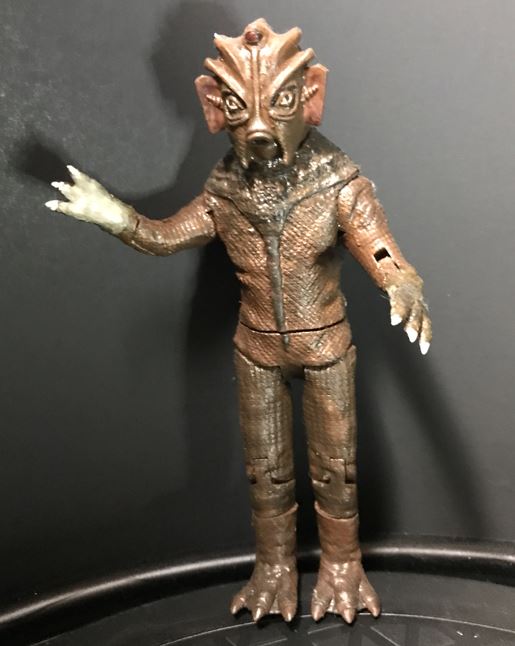
Finished: https://drive.google.com/file/d/14Fa6VAB-z2kretszK816lznNi7cqF4WM

The files used to print this figure are the same, regardless of whether you are printing in
PLA (filament) or SLA (Resin). This figure is primarily designed for SLA resin printing,
and some small parts, like the plugs for the feet may not print properly
in PLA. (if you are filament printing I recommend at least using PLA+)
For SLA resin printing, I highly recommend printing at least the arms, legs, and head using a 70/30% mix of standard ABS-like and flexible
resin like 3DMaterials SuperFlex or SirayaTech Tenacious. Without flexible resin as an additive, these parts may break during assembly or play.

This figure requires at least one 1.5mm wide brass rod to be trimmed to length for the shoulder, elbowand knee pivots. These craft rods can be found online or in most craft stores that have a model airplane section. Alternatively you can use a thin wire coat hanger, sturdy piece of craft wire, or even a toothpick but you may need to widen some holes prior to final curing with a small hand drill.

Before painting, it is recommended that you fit all parts except the feet loosely together without glue to make sure that they fit and move freely. You may need to sand down some parts or drill out some holes if they are too tight or don't fit together smoothly.

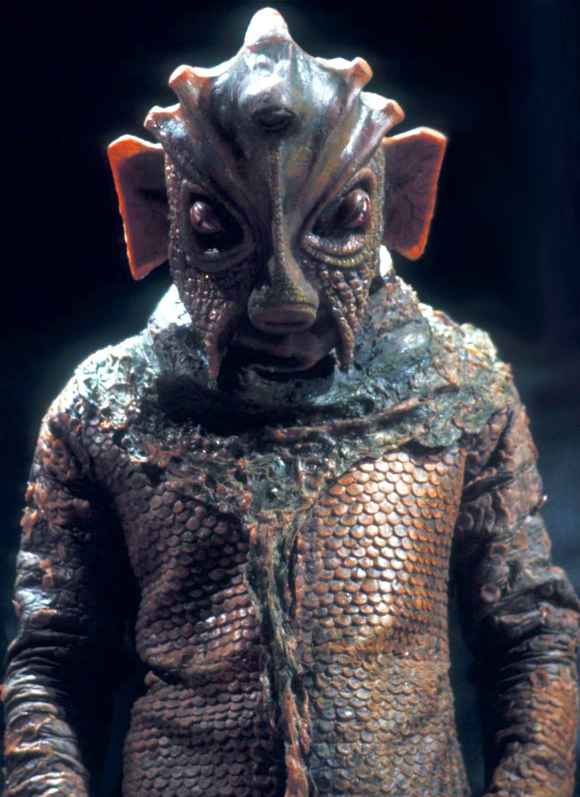
Choosing the "correct" color for your Silurians is tricky since they appear a dark coppery brown in most of the underground scenes, but significantly greener on the surface and when invading the power station. I recommend painting the figure a flat chocolate brown to begin with, then covering the front scales with a copper metallic paint, and then painting over that with a thinned dark brown stain.
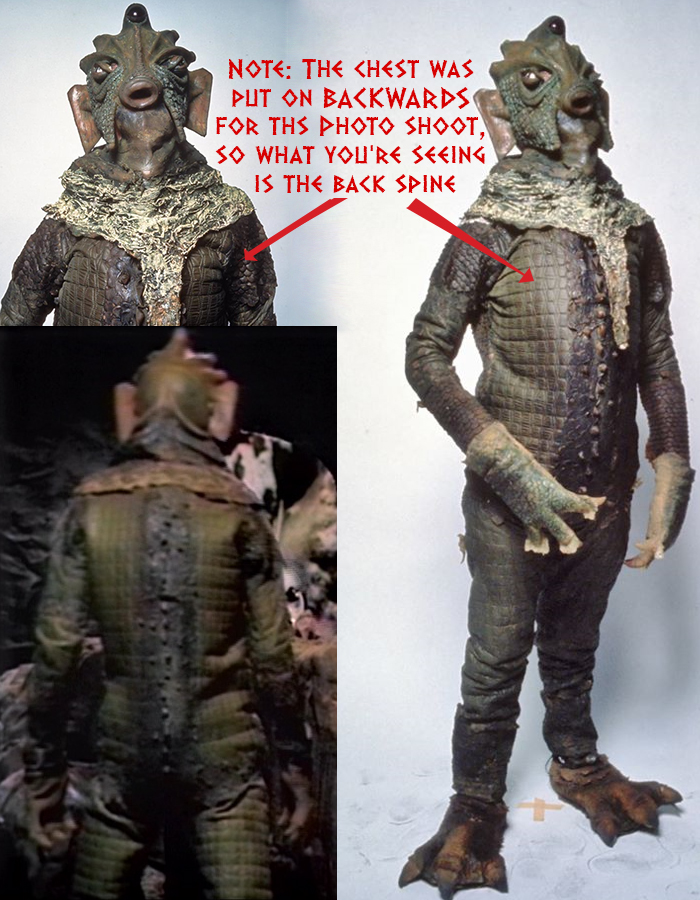
Note that several publicity photos of the Silurians you can find online show the poor sod wearing the costume the wrong way round. This does give us our best look at the back of the costume (which has a different trapezoid-shaped skin texture and spikes running up the spine) but do keep in mind that it was already starting to deteriorate and most of the paint had already peeled off the neck ruff, which was much darker in the transmitted episode.
If you're striving for accuracy,
the back trapezoid skin areas should be a bit greener than the more copper collored front and shoulder scales. The gloves are a lighter green on top and tan on the inside, the ear fins are a semi-transparent amber color, and the third eye at the top of the head is (usually) dark red.

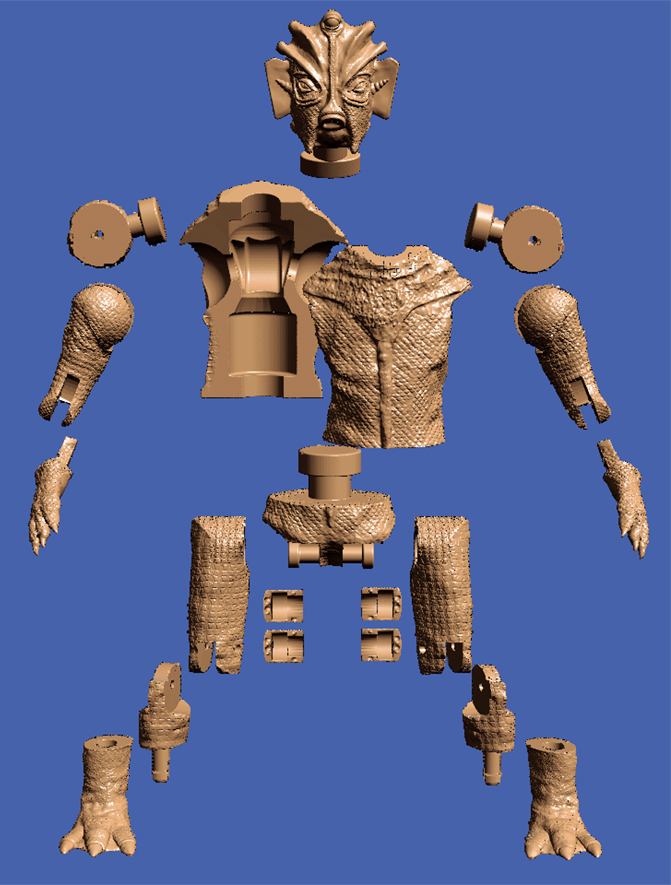
Begin by assembling each Hand/Arm/Shoulder and Foot/Shin/Thigh using 1.5mm wide brass rods trimmed to length about 1mm shorter than the holes. These can be fixed in place using UV craft resin, glue, or even paint. In a pinch you can also use a toothpick or wire coat hanger.
If you printed the Shin out of flexible resin, gently squeeze the two ends of the prongs together and then insert them into the hole in the top of the foot. (make sure you know which is the right and which is the left because once this is done, they cannot be separated) Take care not to twist or bend the connectors as you're inserting them or they could snap. If they won't go in freely you may need to carefully file the holes a bit wider. Once inserted, give them a minute to return to their original shape, and they should be locked in place permanently.
Next glue the Hip Sheaths together around the T-joints of the Crotch. Hold the pieces firmly together, but rotate them every few seconds just to make sure they spin freely and you didn't accidentally glue them in place.
Next, glue the Hip Sheaths/Crotch into the Thighs. Again, don't force them too hard or they could snap, and you may need to file the holes wider if they're too tight.
Finally, insert the T-joints of the Head, Shoulders, and Crotch into the Front Chest, and then glue the Back Chest down around them. If you try to assemble it the other way around the two halves won't close properly.

|