045 - Yeti Mk. II
From The Web of Fear (1968)
Version 1 - Updated 1/14/2024
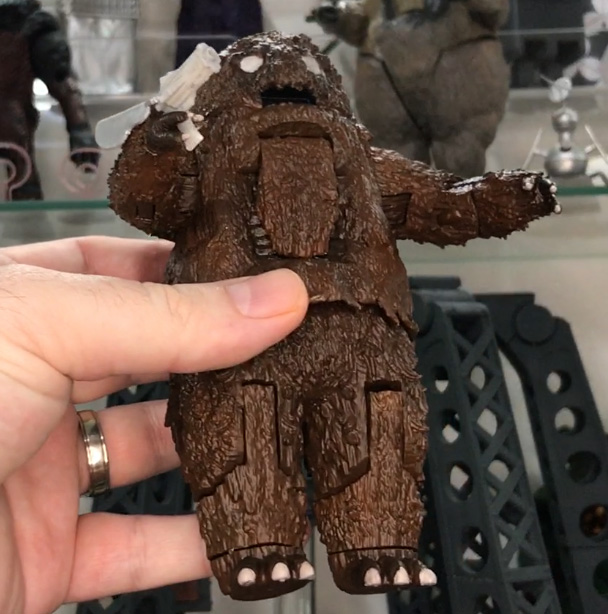
Finished: https://drive.google.com/file/d/1cZYGvFyJNQ_8iWWkNqAL7zhVKp7_4OzS

The files used to print this figure are the same, regardless of whether you are printing in PLA (filament) or SLA (Resin), with the exception of the Web Gun Arm Rest, which has separate
PLA and SLA versions.
This figure is primarily designed for SLA resin printing, and some small parts, like the web gun, statue, and remote control accessory may not print properly in PLA. If you are filament printing I recommend using PLA+/Flex PLA for improved surface detail and stability.
For SLA resin printing, I highly recommend printing the hands, feet, chest flap, front and back body and
accessories out of a minimum 70%/30% mix of standard ABS-like and flexible resin like 3DMaterials SuperFlex (preferred, if you can get it) or SirayaTech Tenacious. The web gun in particular is extremely
thin and fragile and will likely break immediately if not printed out of a flexible material.

This figure requires at least one 1.5mm wide brass rod to be trimmed to length for the shoulder, elbow and knee pivots. These craft rods can be found online or in most craft stores that have a model airplane section. Alternatively you can use a thin wire coat hanger, but you may need to widen some of the holes prior to final curing with a drill. )
This figure also includes an optional light up feature that requires the off-the-shelf purchase of a 2x2 LED brick. If you are not using the light-up feature, you can fill in the button hole on the back of the head and space for the LED brick with craft resin/putty/etc.
You can also use a
2x3 LED light-up brick, but because those are designed to be turned on and off with a "key" you would need to leave the hole for the button open, and then instert a Lego technic axel to turn the eyes on and off when desired.
If you get light spillage from the eyes shining through the mouth or other parts of the figure, try wrapping the brick in a thin layer of aluminum foil as a light barrier before you glue it in place.

Before painting, it is recommended that you fit all parts loosely together without glue to make sure that they fit and move freely. You may need to sand down some parts or drill out some holes if they are too tight or don't fit together smoothly.

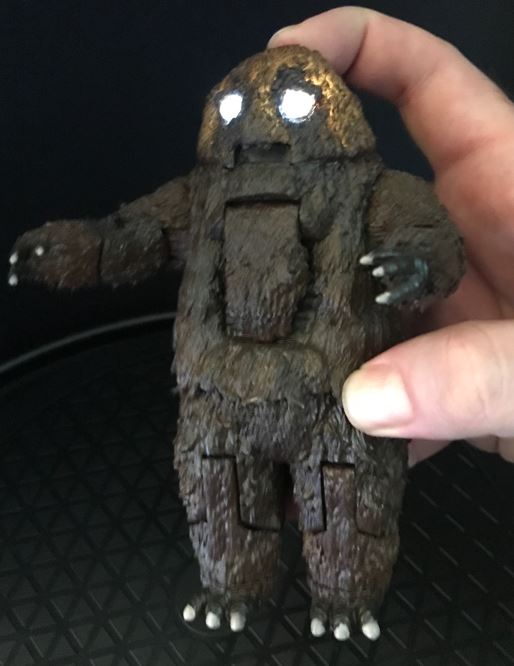
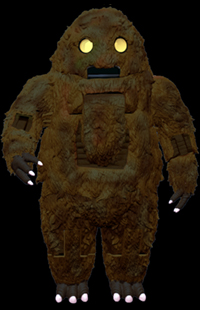
We are lucky that a handful of original props from 1968 still exist today, though most are badly deteriorated. and have deflated over time. The fur is reddish brown and appears to have been made from a variety of pelts, so there's some darker and lighter patches mixed together.
The hands, feet and bare "muscle" patches on the chest and
arms are a dark coffee brown, with ivory colored nails.
The inside of the mouth is flat black, and the upper and lower "lip" of the head were probably painted a similar color brown to the hands, but in some shots appears metallic silver (likely because the paint or latex flaked of.) There is also a darkly colored ring around the outside of the eyes which was also probably dark coffee brown or black.
The eyes likely lit up either white or yellow, but I could not find any color photos from the 1960's that showed them in operation.
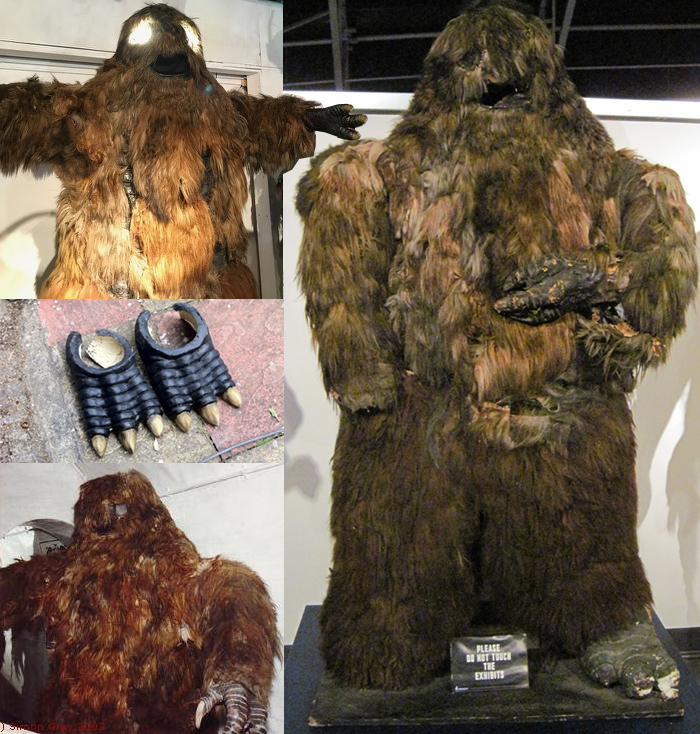
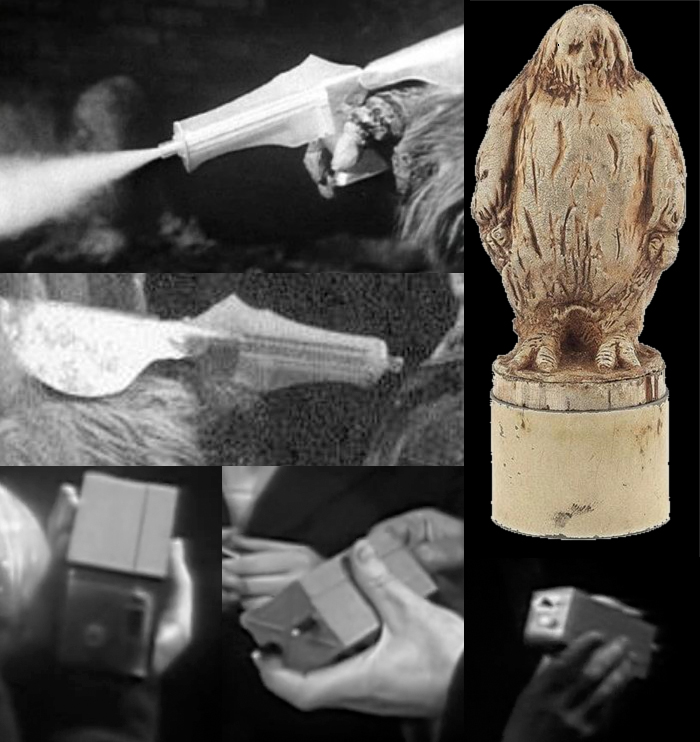
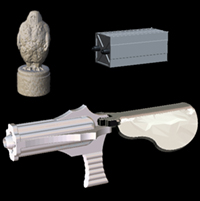
The yeti statues were a light brown/ivory color with dark brown recesses.
The web gun props do not seem to have survived to make it into any exhibitions, but the main gun body appears to have been either silver or white. The fins look like they may have been carved out of
polyethylene plastic (the same material used in white plastic cutting boards) and the slight reflection off the arm guard makes it look like it was cut from a round sheet of galvanized steel or tin (based off the size, possibly the bottom of a wash tub or bucket?) and then bent into the folded shape.
Likewise, we have no color reference photos for the remote control box, but it was likely blue or grey, with two black electrode prongs on the front end with white tips. The back end of the box contained a slide out white plastic drawer with a black sliding switch, and what looks like a stereo plug jack.

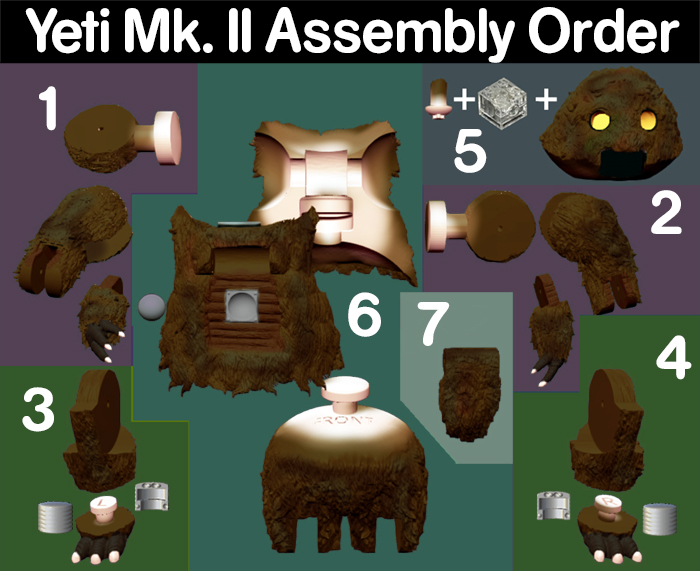
For the Yeti, assemble the arms and legs first (Steps 1-4.) by taking your 1.5mm wide brass rod and snipping it about 1-2mm shorter than the hole. You can then seal the open end of the hole with UV craft resin, glue, or sculpter's putty to seal the rod in place.
If you are going to be using the 2x2 LED brick, first insert the button into the top of the head, and then slide in the brick so that the LED is facing forward towards the eyes. (Step 5.) Test the button is working then glue or tape the brick in from the bottom so it does not slide out. You might want to wrap the non-forward facing parts of the brick with a thin layer of aluminum foil as a light barrier to prevent bleed-through.
You then need to fill in the eye sockets almost to the rim with
Clear UV craft resin (recommended) though you can also use clear caulk, E6000 type glue, or hot glue in a pinch. Try your best to avoid creating bubbles or empty pockets. Allow this to cure/dry/set. If you want to color the eyes yellow, mix up some craft resin/glue with a tiny bit of resin dye, food coloring, or sharpie ink. Use a craft syringe to carefully fill in and round the lens of the eye. This should appear dark yellow when unlit, but light up and glow when you press the button on the head.
Finally, lock the legs into the waist, and then clamshell the front and back halves of the body around the waist and shoulder T-pegs. (Step 6.) Then glue the head onto the completed body and use a 1.5mm wide brass rod to seal the chest flap in place. (Step 7.) The control sphere should remain in place in the chest cavity, as long as the chest flap is in the closed position.

|
 |