REMIX003 - The Meddling Monk and TARDIS
Original Monk head sculpt by David Turner, Monk's TARDIS by Jeffrey Fink
Remixed by Troy Ryan Wood
Version 2 - Updated 2/12/2022
Final: https://drive.google.com/file/d/1rSz_tEKqhWtzPFLzFtQ0q_NKMvmhwC2Q/

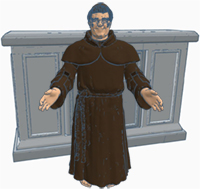
This figure came about because David Turner shared his amazing 1:6 scale Peter Butterworth head sculpt with the group, and I already had a fairly screen accurate monk's robed sourced that I hadn't done anything with. Jeffrey also kindly provided the Monk's TARDIS to complete the set. Special thanks to the "Scan the World" project, and Saint Anthony of Pauda... whoever you were, for providing the original robe. You can find David's original 1:6 scale head, as well as several of his other designs below in the "Other Scale" section of the website.

The files used to print this figure are the same, regardless of whether you are printing in
PLA (filament) or SLA (Resin). The Monk should be printable in PLA, but SLA resin is highly recommended, at least for the head(s) to maximize facial detail. When SLA printing, always angle the head approximately 45° so that the face is pointing up away from the build plate. I recommend using a flexible resin like 3DMaterials SuperFlex or SirayaTech Tenacious as an additive, at least for the hands and accessories to prevent accidental snapping.
The Monk's TARDIS is primarily designed for PLA filament printing, as is too large to fit on most entry-level resin printers, even if you rotate the design. If you do resin print, you will likely have to plane cut the Top, Middle, and Base into two halves so that they will fit in your build area. Make certain that you clean out the hinge holes thoroughly before you cure the doors, otherwise they may dry solid and you will have to attempt to drill them out.
This zip files includes three subfolders for The Meddling Monk, The Monk's TARDIS, and Optional Accessories. Optional accessories are not necessary to print the main figure but
are available if you want to print:
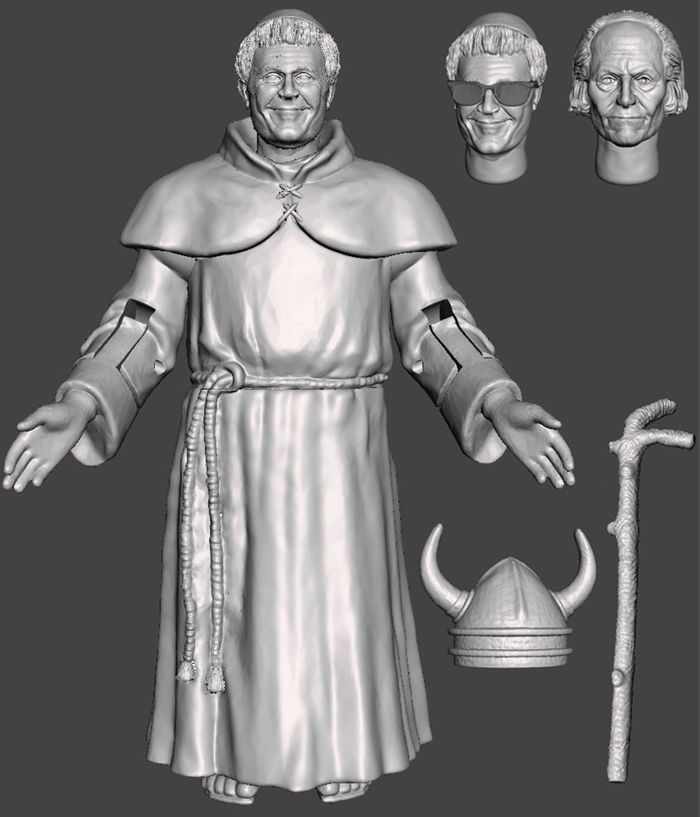
- Alternate quick-swap Monk's head with sunglasses as seen in The Daleks' Master Plan.
- Alternate quick-swap 1st Doctor head to create the disguised Doctor from Episode 4, or the Abbot of Amboise from The Massacre. (Since no telesnaps exist for that story, and we have no idea what the 1st Doctor's doppelgänger costume actually looked like)
- The stick used as a pretend rifle by the 1st Doctor to threaten the Monk.
- A space helmet for a cow
- and a pair of sunglasses (separate) for the Monk to wear. Note this is very small and very fragile and you will need to mix in at least 50% flexible resin as an additive if you are printing out of SLA resin so that it will bend rather than break.
The Monk's TARDIS has an optional printable insert if you want to add a sticker or cardstock to the back interior wall showing the shrunken console room interior. This should ideally be
printed at 600 DPI (standard DPI for laser printers), and measures 147mm wide by 93mm tall (the same dimensions as the back wall).

This figure requires at least one 1.5mm wide brass rod to be trimmed to length for the elbow and leg joints. These craft rods can be found online or in most craft stores that have a model airplane section. Alternatively you can use a thin wire coat hanger or even a toothpick, but you may need to widen some of the holes prior to final curing with a small hand drill.

Before you paint and assemble your figure(s) it is recommended that you fit all parts together without glue to make sure all points of articulation slot into place and move correctly. You may need to sand down some parts or drill out holes if pieces do not move freely.

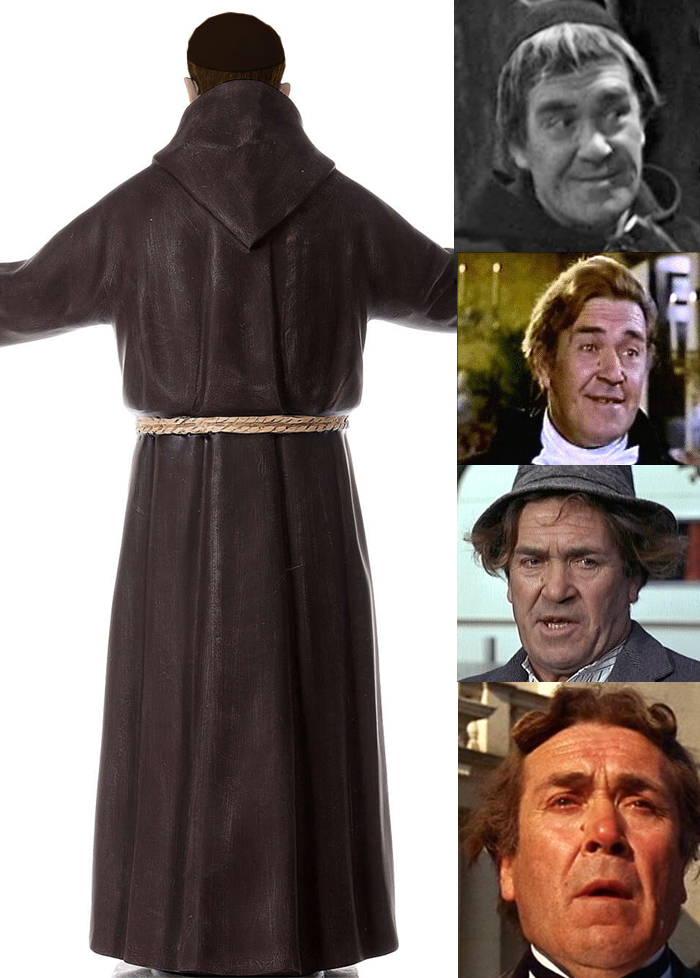
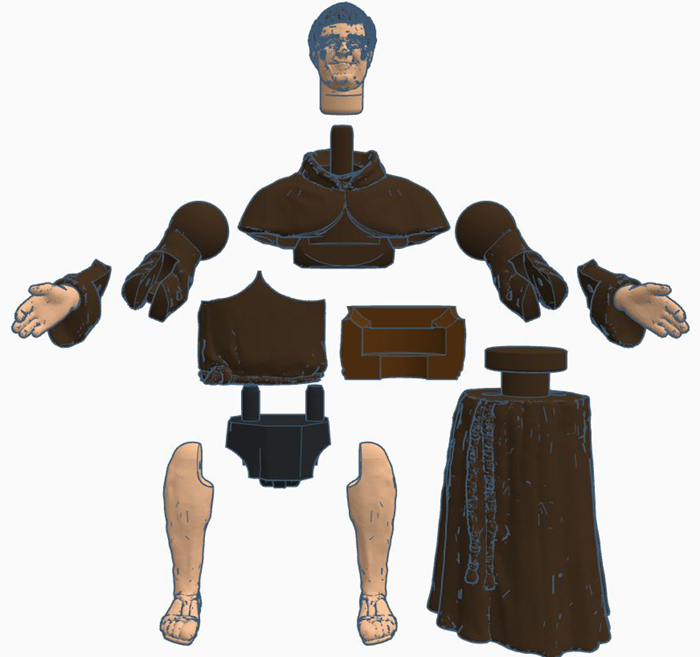
I could not find a single color reference photos for the monk's costume, but the robe appears to be an extremely dark brown, and his skullcap looks to be roughly the same color. His belt would have a been a light sisal-colored tan. While we don't get a good look at his sandals they were likely leather and a similar color to his robe. His feet and legs would have been bare.
Peter Butterworth's hair looks much darker during television appearances in the 1970's, but he often sported a much lighter chestnut color during the 1960's, as can be seen in the Carry On films. Given that his hair appears so much lighter than the skull cap and hood durring The Time Meddler, I believe his hair was probably fairly close to the color shown in the example photos below.
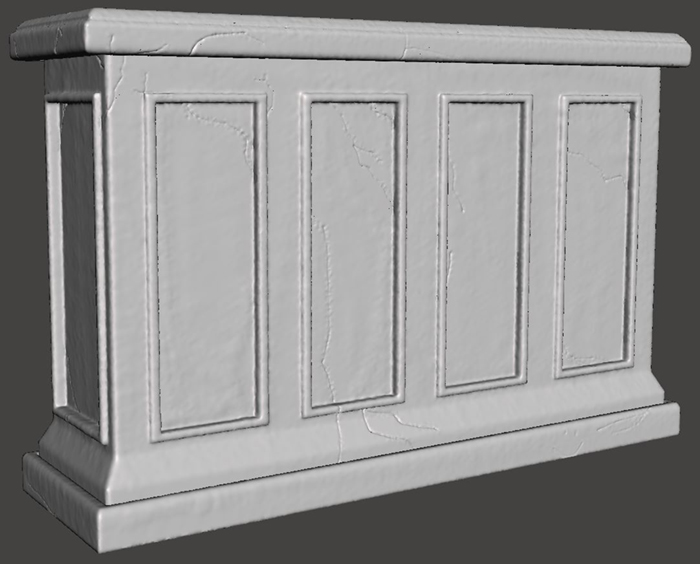
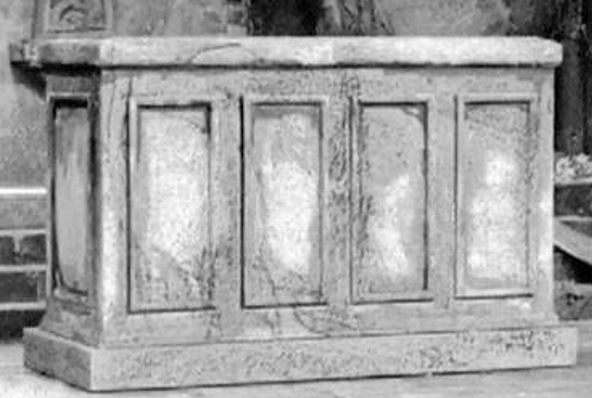
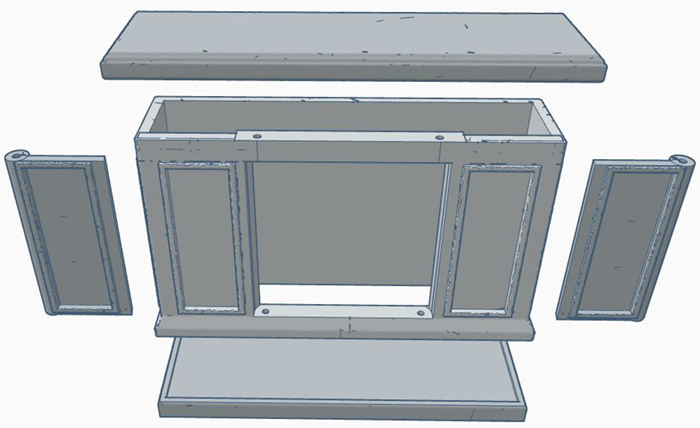
Likewise, we don't have color references for the Monk's TARDIS, but it should be a light grey stone color. The center of the rectangular panels tend to be slightly lighter than the rest of the altar, with the cracks and corners are darker. The inside should be painted flat black, except for the rear wall if you are going to be printing the shrunken TARDIS interior sticker.

After painting, begin by assembling the elbow and leg joints using 1.5mm wide brass rod trimmed to just a couple of mm shorter than the depth of the hole. I prefer the brass rods for my design because they're incredibly sturdy while still easy to cut, but you can always use
a toothpick or bit of coat hanger if you want.
Once the rod is all the way through the elbow pivot, seal the open end with UV craft resin, craft putty, or crazy glue gel. You can do the same with the legs, but this is not strictly necessary, as once you insert them up inside the robe, they will be locked in place and cannot fall out.
Next, flip the lower half of the robe upside down and insert the legs/crotch so that the pegs slot into the peg holes. When assembled correctly, you should just barely be able to see his toes past the bottom of the robe. Note that if you printed the skirt with internal supportsyou may need to sand or file down the inside to make sure that the crotch can travel all the way down and sit flush without getting caught on anything.
Next, pop the ball joints of the arms into the shoulder holes of the upper hood.
It may be a tight fit, and if they won't pop in on the first try, you may need to sand down either the ball joint ot the edges of the shoulder holes.
Finally, glue the front and back chest around the T plug of the lower robe like a clam shell so that the waist moves freely inside.
Once this is dry. glue the upper torso to the lower, making sure that the arms still move freely in their sockets.
For the Monk's TARDIS, first stick the shrunken TARDIS interior image to the inner back wall of the model if you plan on using one. Make sure you know which direction is up. (The tapered corners should be down at the bottom)
Next,
glue the center section down to the base, then insert the two doors, and drop 1.5mm wide brass rods down from above to act as internal hinges, trimming the rods to be 1mm shorter than the upper edge of the hole. (The rods need to go all the way through into the base. Make sure you test both doors to make sure the rod has gone all the way down locking it in place, and both doors swing freely without coming loose.
Then glue down the top of the model, sealing the internal hinges from both ends.

Coming soon.
|
|