REMIX006 - Mandrel and CET Machine
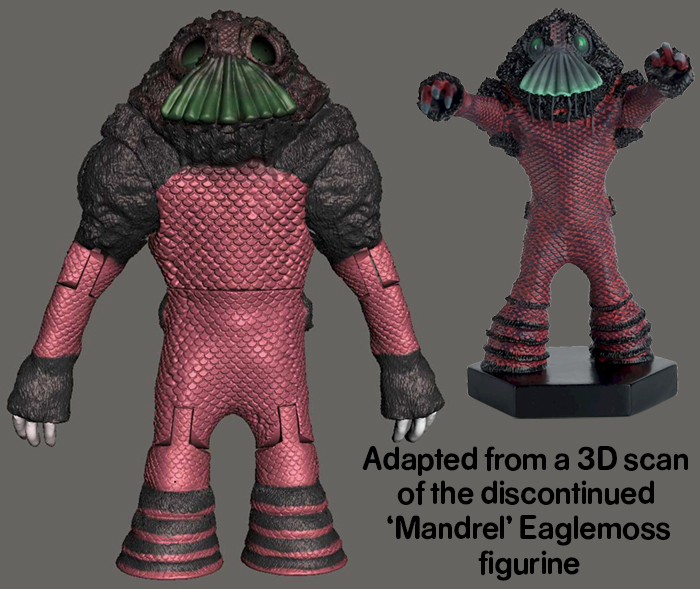
Adapted from the Eaglemoss Mandrel figurine (no longer available)
Original Mandrel design by unknown
3D Scanned by John DiMaggio
Remixed by Troy Ryan Wood
Version 1 - Updated 8/1/2023
Final: https://drive.google.com/file/d/11AJaSHHUkKyXB3Y2GYlPZmr2JREm9hHn

This was our project's second attempt at using a 3D scanner to reproduce an existing Eaglemoss figurine in 5.5" scale. Special thanks to John DiMaggio again for providing these scans, and of course, extra special thanks to whichever 3D artist modeled the original Mandrel sculpture my remix is based on. Unfortunately, the Eaglemoss magazines did not provide an artist's credit, but I do want to be perfectly clear an upfront that this is a remix of another artist's work, and not a fully original creation. (And absolutely not to be sold under any circumstances!)

Both The Mandrel and CET Machine figures are primarily designed for SLA (resin) printing, but can be printed out of PLA (filament). The files used are the same for both materials.
If you are filament printing I recommend using PLA+/Flex PLA for improved surface detail and stability, and if you are SLA resin printing, I recommend using at least a 20% mixture of flexible resin like 3DMaterials SuperFlex or SirayaTech Tenacious for added durability, especially on the arms and CET Machine base. Without flexible resin, these parts may break off if dropped or played with.
The CET Machine comes with multiple optional parts.
If you are printing out of PLA it is recommended you print the Top for Sticker and then print the dial sticker jpg as a 15mm wide sticker using sticker paper and a high quality printer, or a sticker-printing service.
If you are using PLA+/FlexPLA you can try printing the Top for Dial and Dial (raised) though the lettering may or may not be visible.
If you are printing out of SLA you can print the Top for Dial and then, if you have black resin, you can print Dial Recessed and use the "paint and wipe" method to fill in the recessed lettering with a white paint pen. Otherwise, you can print the Dial (raised) and then attempt to very lightly brush the tops of the raised letters with white paint.

This figure requires at least one 1.5mm wide brass rod to be trimmed to length for the shoulder, elbow and knee pivots. These craft rods can be found online or in most craft stores that have a model airplane section. Alternatively you can use a thin wire coat hanger, but you may need to widen some of the holes prior to final curing with a drill. )
This figure also includes an optional light up feature that requires the off-the-shelf purchase of a 2x2 LED brick. If you are not using the light-up feature, you can fill in the button hole on the back of the head and space for the LED brick with craft resin/putty/etc.

Before painting, it is recommended that you fit all parts loosely together without glue to make sure that they fit and move freely. You may need to sand down some parts or drill out some holes if they are too tight or don't fit together smoothly.

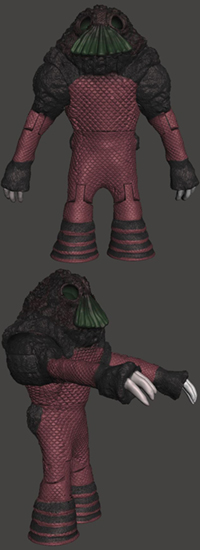
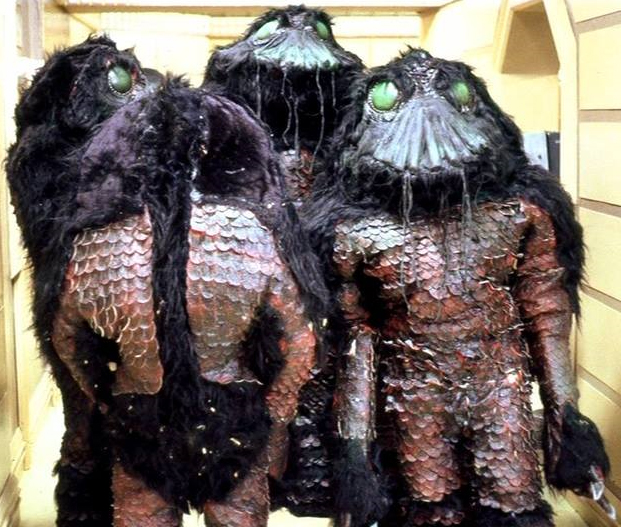
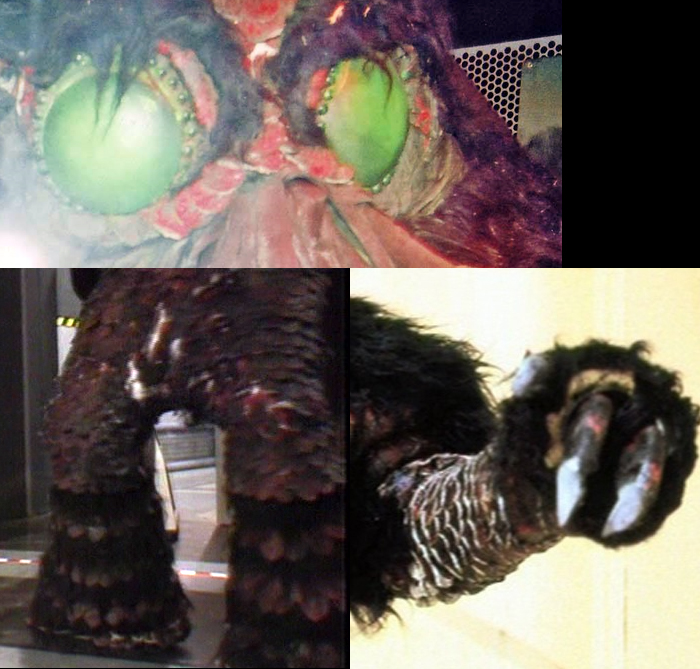
The Mandrel's scales are a dark mahogany red, and the fur is black. The tubed "snout" area is tinted green, especially down towards the bottom.
The circular area directly around the eyes and the small bumps are gold.
Th eyes themselves are transparent green (do not fill these in until you get to the assembly instructions)
The claws are a mix of black and mahogany, except for the tips of the claws, which are light grey.
The feet are mostly black hair with four single rows of scales poking out in concentric circles. (Do not refer to the Eaglemoss figurine as a painting guide here since they got the scale and fur sections reversed)
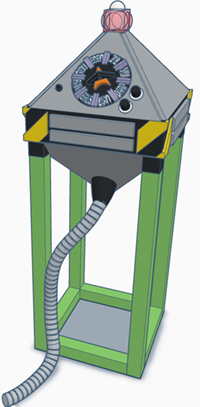
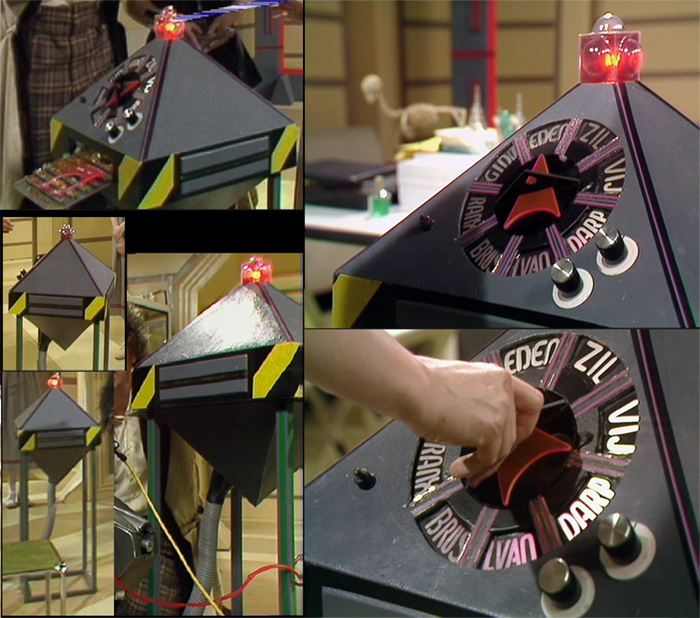
For the CET Machine, the main diamond area of the machine is a flat battleship grey. The corner indentations are black but with a very thin purple line running up the middle the same color as the outer edges of the dial separators.
The center section of the machine has alternating black and yellow caution stripes on the corners.
The square light on the top of the box is transparent red except for a white tip. The pointer tip is a translucent neon orange, and the dial lettering is silver or white depending on illumination. The small button on the left side of the controls is solid black, the two dials on the right have white bases, black dials, and silver dial tops.
The legs of the machine are industrial tractor green. The corrugated hose that connects up to the bottom of the machine is grey, except for the very top, which is black.

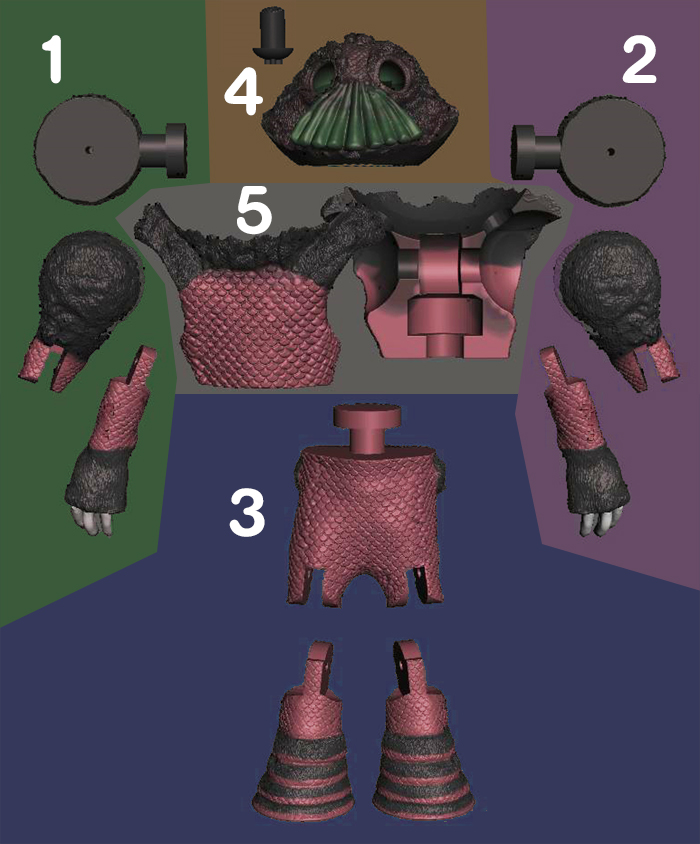
For the Mandrel, assemble the arms and legs first by taking your 1.5mm wide brass rod and snipping it about 1-2mm shorter than the hole. you can then seal the open end of the hole with UV craft resin, glue, or sculpter's putty to seal the rod in place.
If you are going to be using the 2x2 LED brick, insert the button into the top of the head, and then slide in the brick so that the LED is facing forward towards the eyes. Test the button is working then glue or tape the brick in from the bottom so it does not slide out.
You then need to fill in the eye sockets almost to the rim with
Clear UV craft resin (recommended) though you can also use clear caulk, E6000 type glue, or hot glue in a pinch. Try your best to avoid creating bubbles or empty pockets. Allow this to cure/dry/set and then mix up some craft resin/glue with a tiny bit of green resin dye, food coloring, or green sharpie ink. Use a craft syringe to carefully fill in and round the lens of the eye. This should appear dark green when unlit, but light up and glow when you press the button on the head.
Finally, lock the shoulders and waist in place with the two halves of the chest clamshell and then glue the head onto the completed body.

Coming soon.
|