REMIX007 - Solonian Mutant (Mutt)
Adapted from CAD designs for an unreleased Character Options figure kindly shared by Al Dewar himself!
Original Mutt design by unknown
Remixed by Troy Ryan Wood
Version 1 - Updated 4/20/2024
Final: https://drive.google.com/file/d/1ve8dpoguaDJPTM5vDZqyHVfLD7Zp_wXP

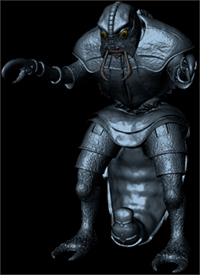
This is a special treat for fans, and a rare glimpse of an official figure that might have been straight from the vaults (or hard drive) of Character Options! Sadly, gorgeous one-off figures with zero recycled parts like this are no longer possible given the current economic climate in the U.K., which is why they agreed to share this particular model publicly.
Note that while Al did not specifically mention the copyright status of his files, I am treating them as non-commercial use only, just like all our other guest artists, and my remixed articulated version is certainly protected under the same BY-NC-SA Creative Commons license as our other figures. There are enough visual differences between my remix files and the CO original, that I can easily tell them apart if we happen to catch somebody attempting to sell them.
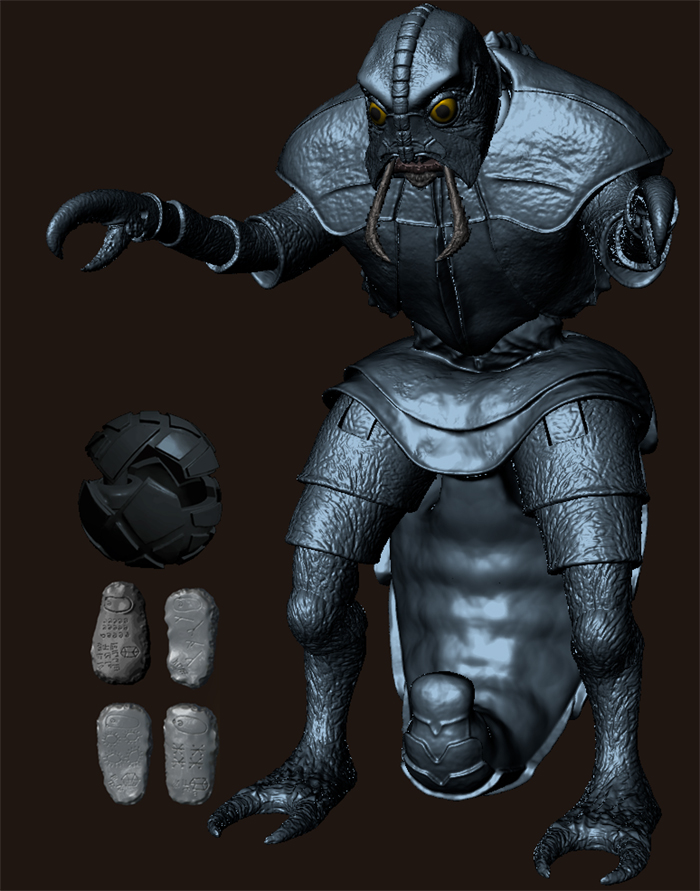
My remix tried to preserve as much of the original fine surface design as possible, but I did have to make a few minor alterations to aid articulation. The files that Al shared came with semi-functional glue-together ball joint, which I suspect are signs that this was intended to be a 'Collect and Build' figure which would have used pop-in peg connections for the arms, legs, head, and torso, similar to what was used on the original Wave 1 K-1 Robot.
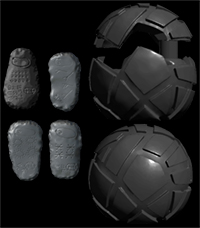
As resin is quite rigid and doesn't allow for pop in parts like this (at least not easily) I had to split the torso and abdomen into a clamshell design and fuse the lower half of the waist to the hips. In doing so, I also widened the waist/spine to be more screen-accurate and repositioned the legs to improve overall balance... though the figure is still notably top heavy and prone to falling over.
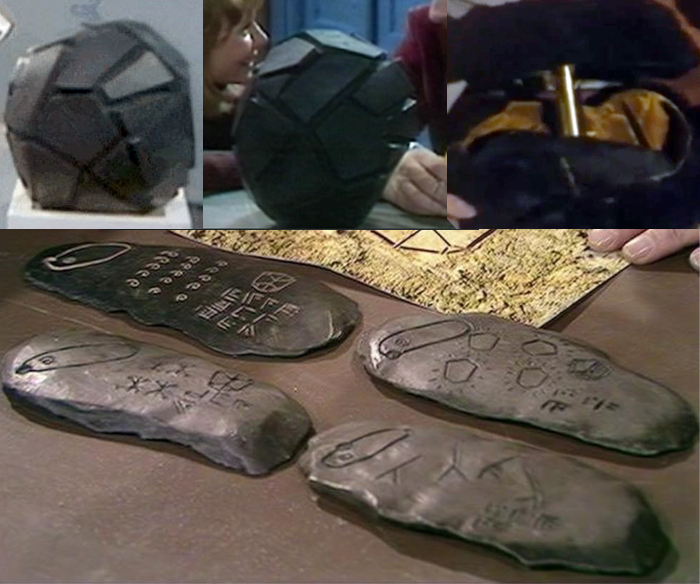
I also created some fun bonus accessories in the form of the Time Lord message sphere and the four Solonian tablets that can be placed inside.

The files used to print this figure are the same, regardless of whether you are printing in PLA (filament) or SLA (Resin). There are two versions of the Time Lord Message Sphere accessory; a solid version for regular SLA and PLA printing, and a two-piece hollow version designed for flexible resin and PLA+.
This figure is primarily designed for SLA resin printing, and some small parts, like the Solonian tablets may not print properly in PLA. If you are filament printing I recommend using PLA+/Flex PLA for improved surface detail and stability.
For SLA resin printing, I highly recommend using a flexible resin like 3DMaterials SuperFlex (preferred, if you can get it) or SirayaTech Tenacious as an additive and strengthening agent. The mandibles in particular are extremely
thin and fragile and will likely break immediately if not printed out of a flexible material.
I'd recommend printing most body parts out of a minimum 80/20%
mix of regular ABS-like resin and flexible resin, but the mandibles, sphere top, and tablets should be printed out of at least a 50/50% mixture. At 100% flexible, the mandibles can actually be wiggled and moved around and shouldn't break unless you're extremely rough with them.

This figure requires at least one 1.5mm wide brass rod to be trimmed to length for the shoulder and leg joint pivots and one 1mm wide brass rod for the pincers. These craft rods can be found online or in most craft stores that have a model airplane section. Alternatively you can use a thin wire coat hanger for the 1.5mm rod, but you may need to widen some of the holes prior to final curing with a small hand drill. A thumb tack that you've snipped to length also works fine as a replacement for the 1mm rod.

Before painting, it is recommended that you fit all parts loosely together without glue to make sure that they fit and move freely. You may need to sand down some parts or drill out some holes if they are too tight or don't fit together smoothly.

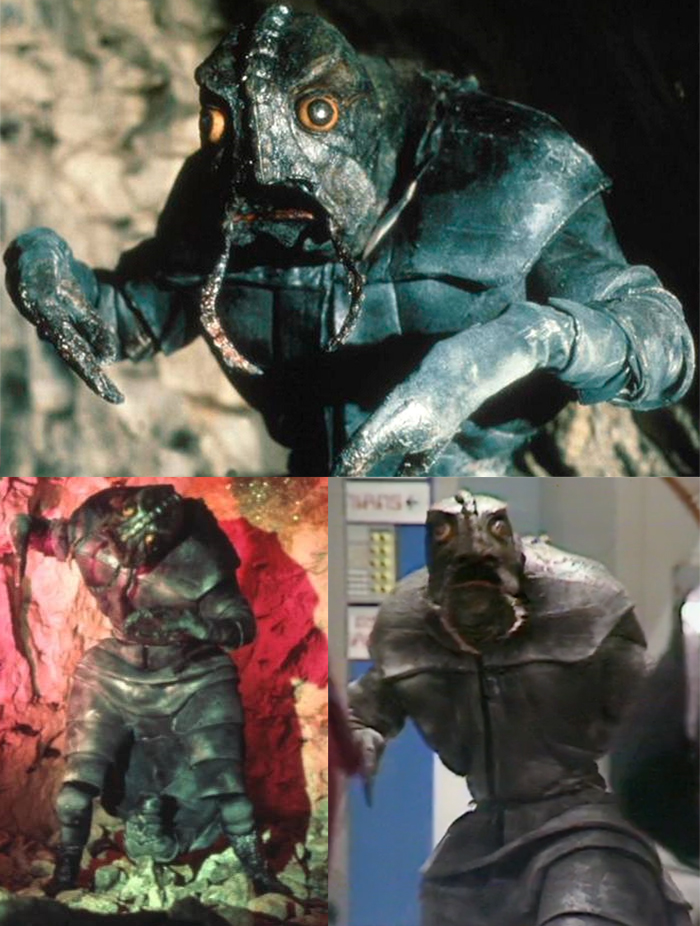
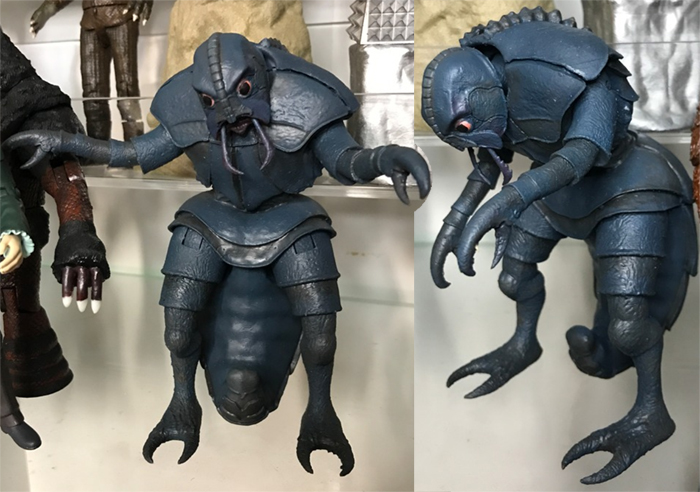
The Mutt is primarily a bluish grey with a semi-gloss sheen, but appears slightly different depending on the lighting. The inside "lip" area of the lower jaw is dark red, and you can see traces of red on the mandibles, parts of the face, and the pincers.
The eyes are an orangish-ivory, with large black pupils. While harder to see, the spine ridges along the back appear to be a slightly lighter greyish brown on some mutants and glossy black on others (this may be because the paint flaked off during location filming and had to be hastily replaced.)
The message sphere is a satin black or charcoal. The interior of the sphere is yellow (or perhaps just unpainted fiberglass) while the lifting arm is golden/bronze.
Tablet 1 is a dark black with white lettering (I recommend printing out of black resin and using a white paint pen and a damp paper towel to try to fill in the tiny cracks with paint, and then quickly wipe off the surface so that only the lettering remains) but Tablets 2, 3, and 4 are a lighter clay color with black carvings.

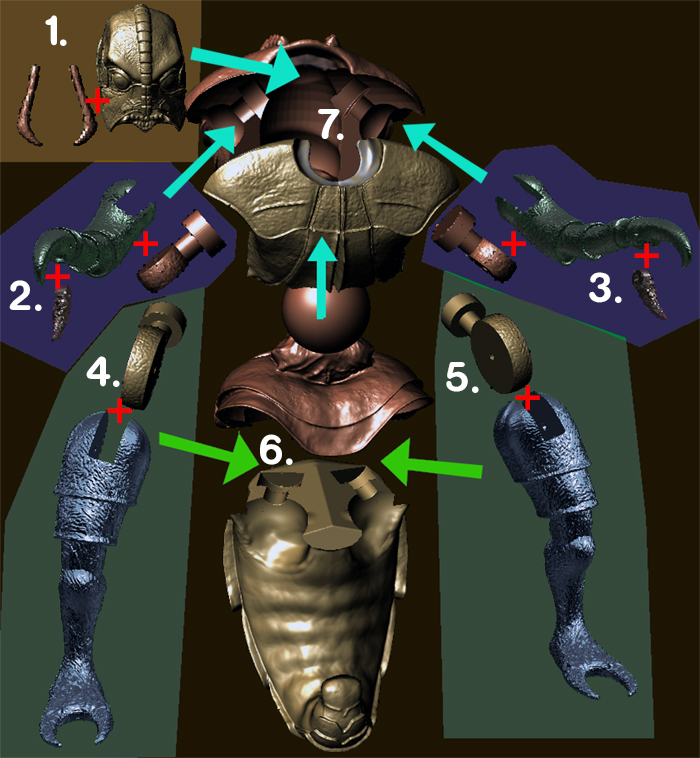
To assemble the Mutt, begin by gluing the mandibles into the head (make sure the pointed ends are facing inward as shown, and then assemble the arm, pincer, and leg joints by taking your 1.5mm wide brass rod and snipping it about 1-2mm shorter than the hole. You can then seal the open end of the hole with UV craft resin, glue, or sculpter's putty to seal the rod in place.
Once all four limbs are assembled, insert the T-plug of the legs into the mounting holes on the abdomen, and then glue the abdomen to the crotch, making sure that the T plug spins freely and does not get any glue on it.
Finally, insert the T-plugs of the arms, and the ball joints of the head and crotch into the front and back of the chest, and then glue the two halves together... again, making sure that all articulated parts move freely and do not get glued in place.
If you are using the hollow version of the sphere accessory printed out of flexible resin or PLA+, very carefully pinch the end of the connector, and then insert
it into the hole. If you printed out of flexible resin, it should take about a minutefor the prongs to elastic back to their original position, locking the two halves of the sphere together.
To open and close, you need to lift straight up and then pivot to the right or left.

|
|